


Hello everyone! Welcome to my tutorial, here I'll be showing you how I made a task managing app using Supabase and Next.js. The frontend will be hosted on vercel and we will be using supabase for managing our database.
Before I begin I would like to address that there might be some implementations or practices used which might have a better alternative and there may be some which are not recommended at all. I am open for recommendations as well as correction and you may use the comment section to do so.
The purpose of the blog is not to teach you the basics so knowledge of fundamental concepts is required.
Let's begin
Supabase setup
First, let's setup our database in supabase. Before creating your database you need to create a project in supabase, to do so click on new project and select your organization if you already have one, if not then make a new by clicking on New Organization.
Now enter your project details
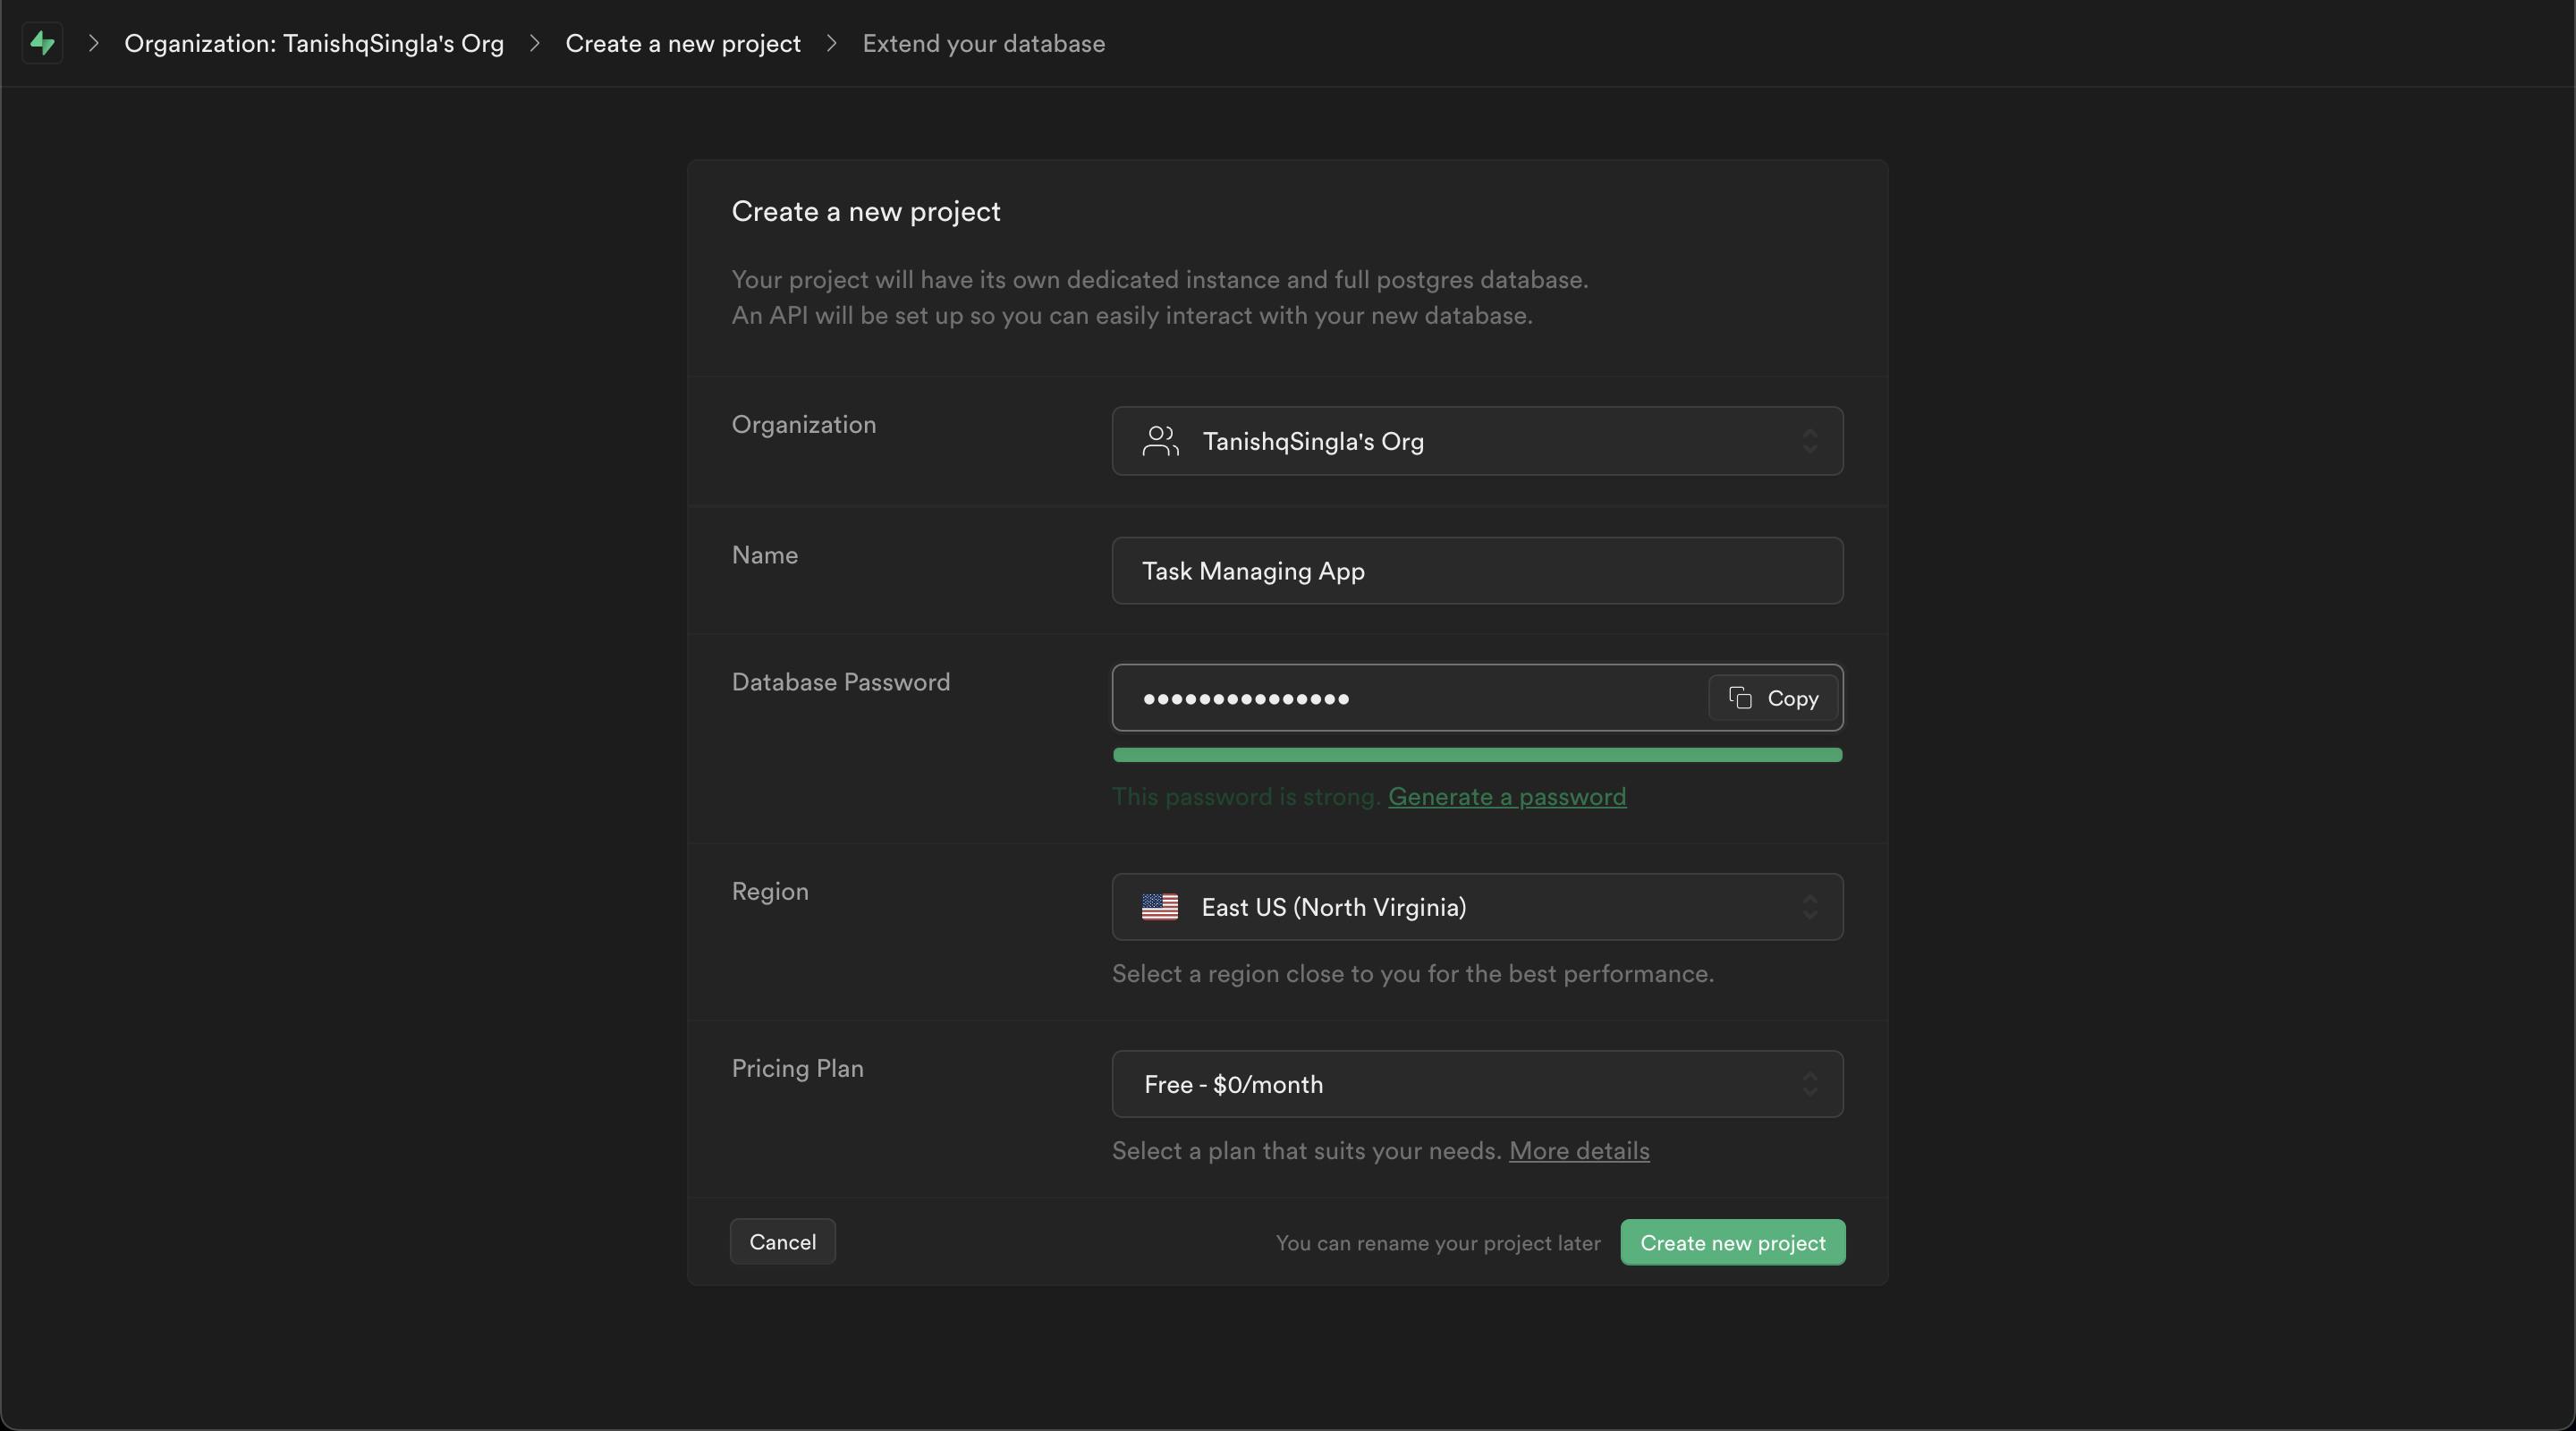 Here's how my project details look like. Now let's hit
 Create New Project, now supabase will take a minute or two to setup your project.
NOTE: While creating your project details there will be an option to select region, you can select any region but keep in mind that you won't be able to change it later.
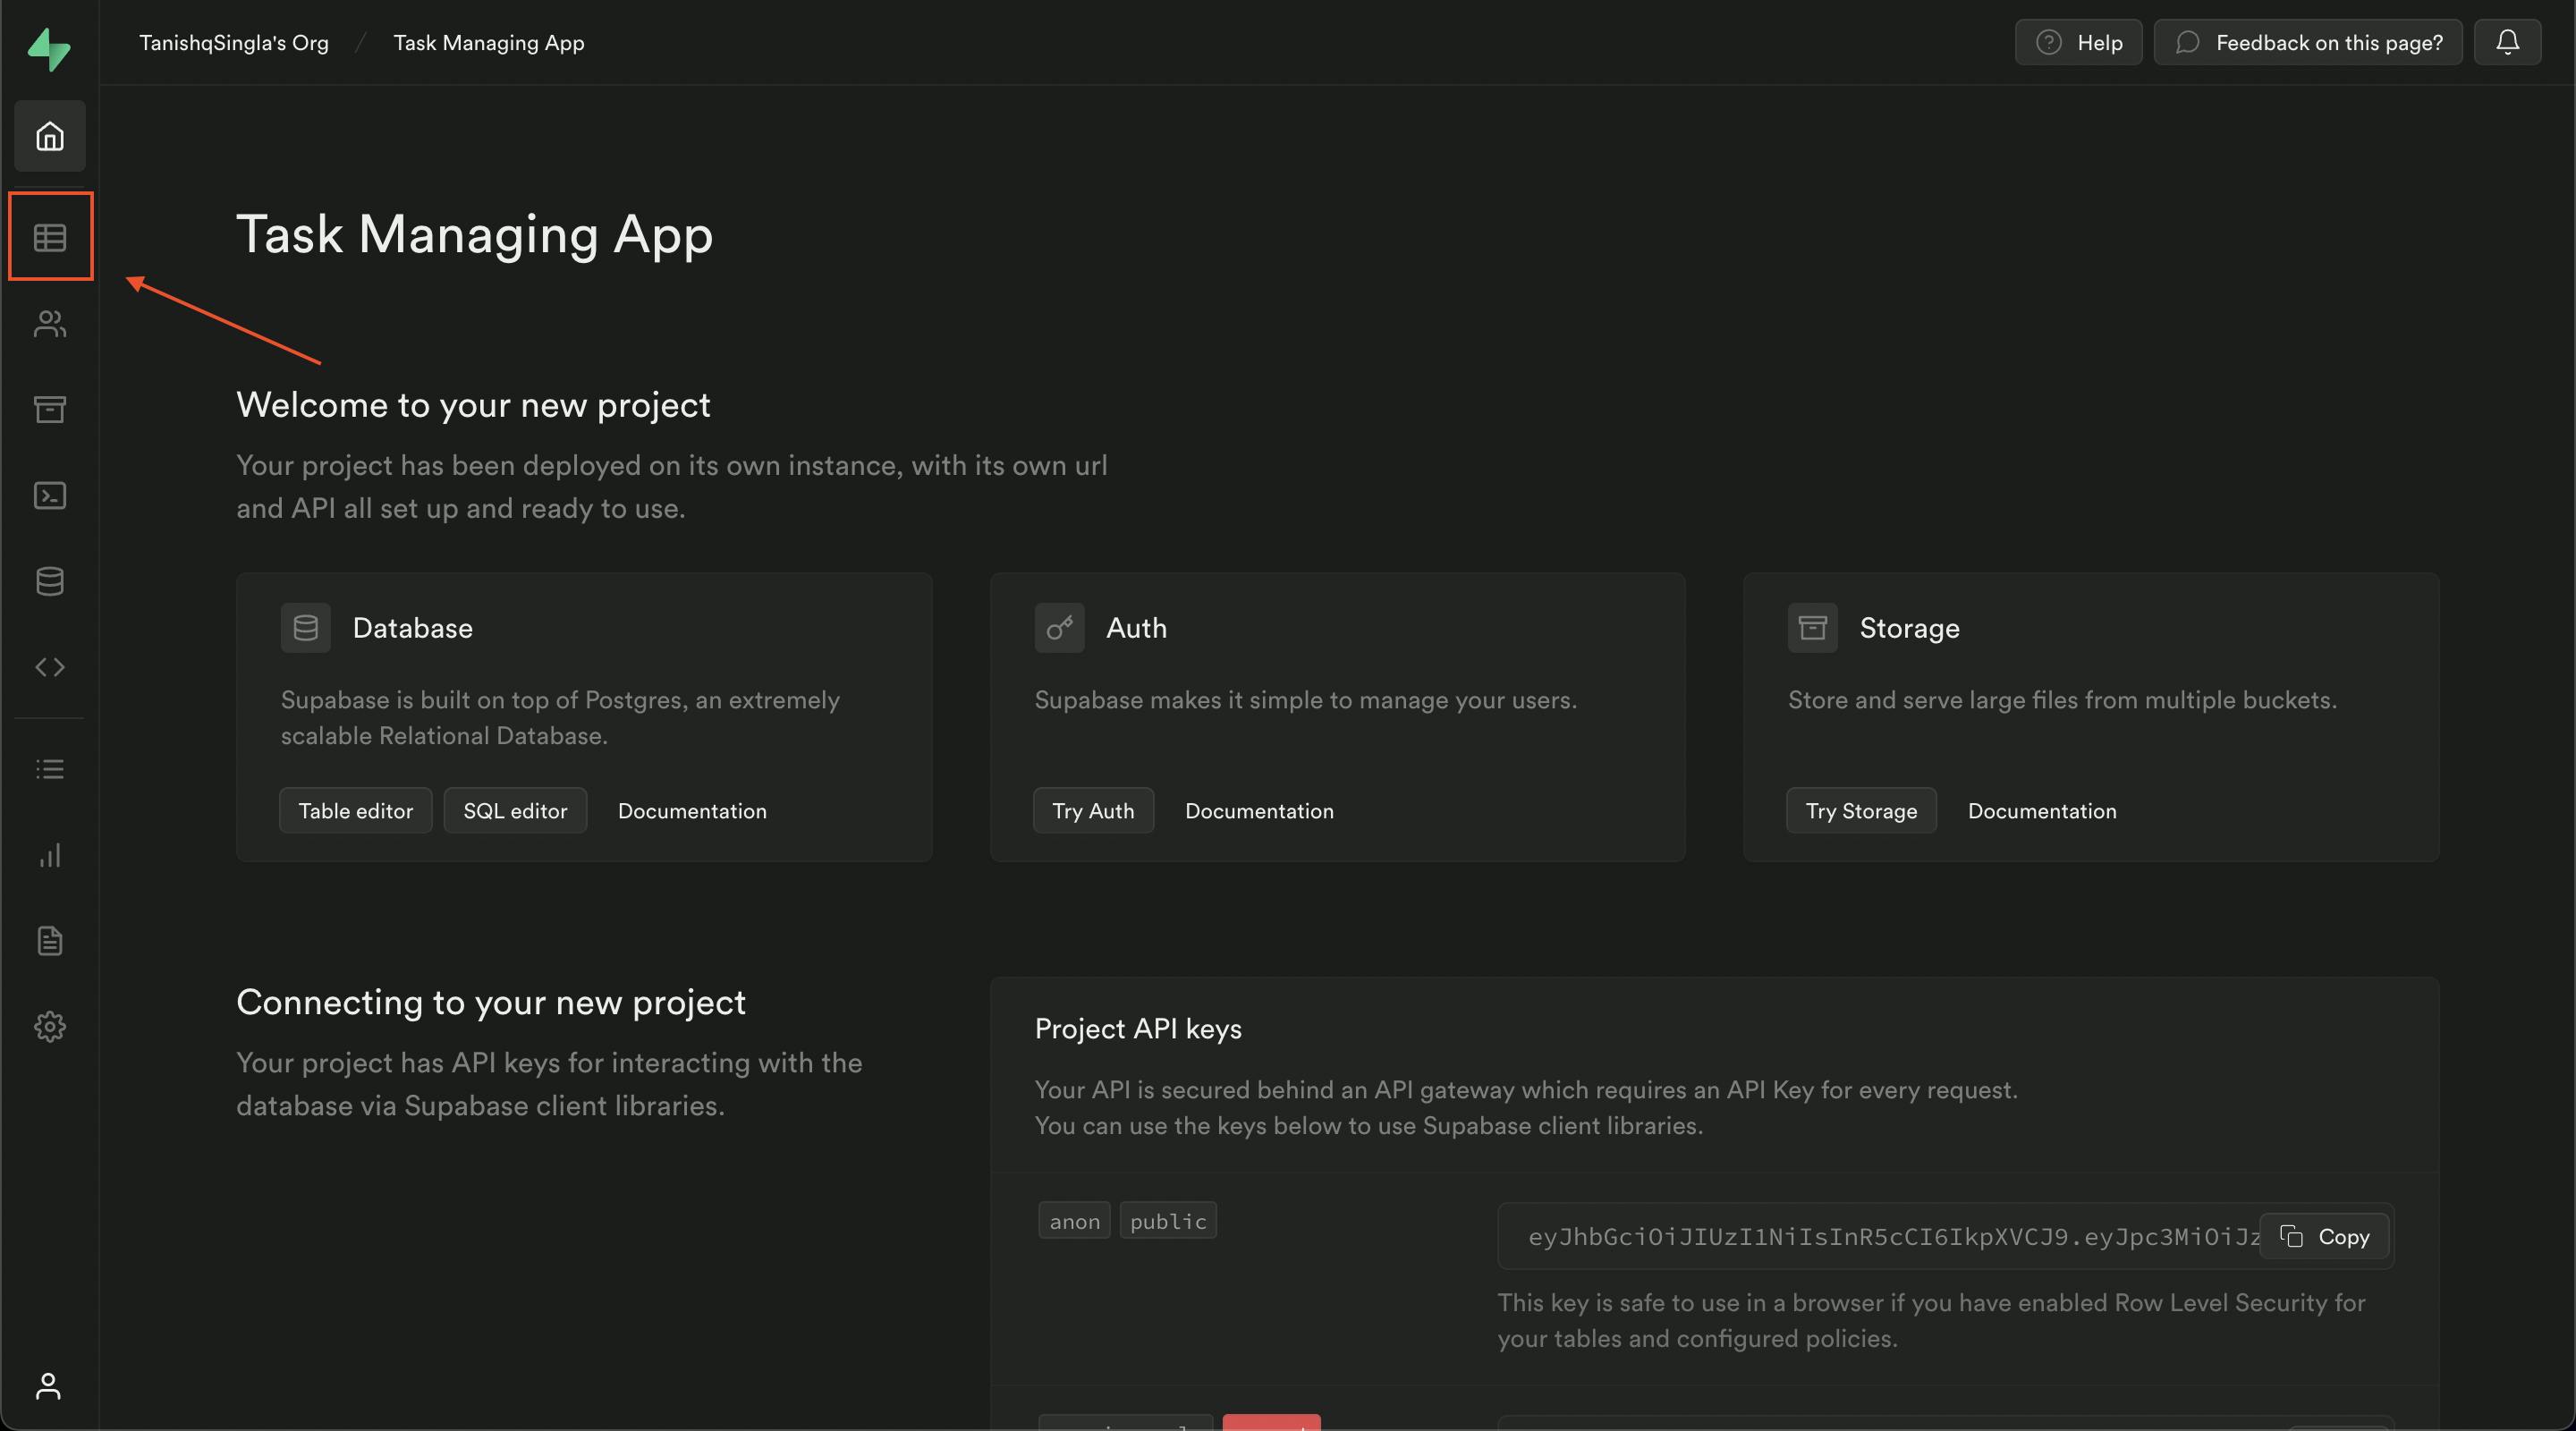
Creating our database table in supabase
Now this is one of the things I like about supabase. Supabase provides you two options for managing tables, either you can use the supabase UI or if you love writing SQL queries to manage your database you can do that too! I am going to demonstrate how to create a table in both of them.
Create Table using Supabase UI
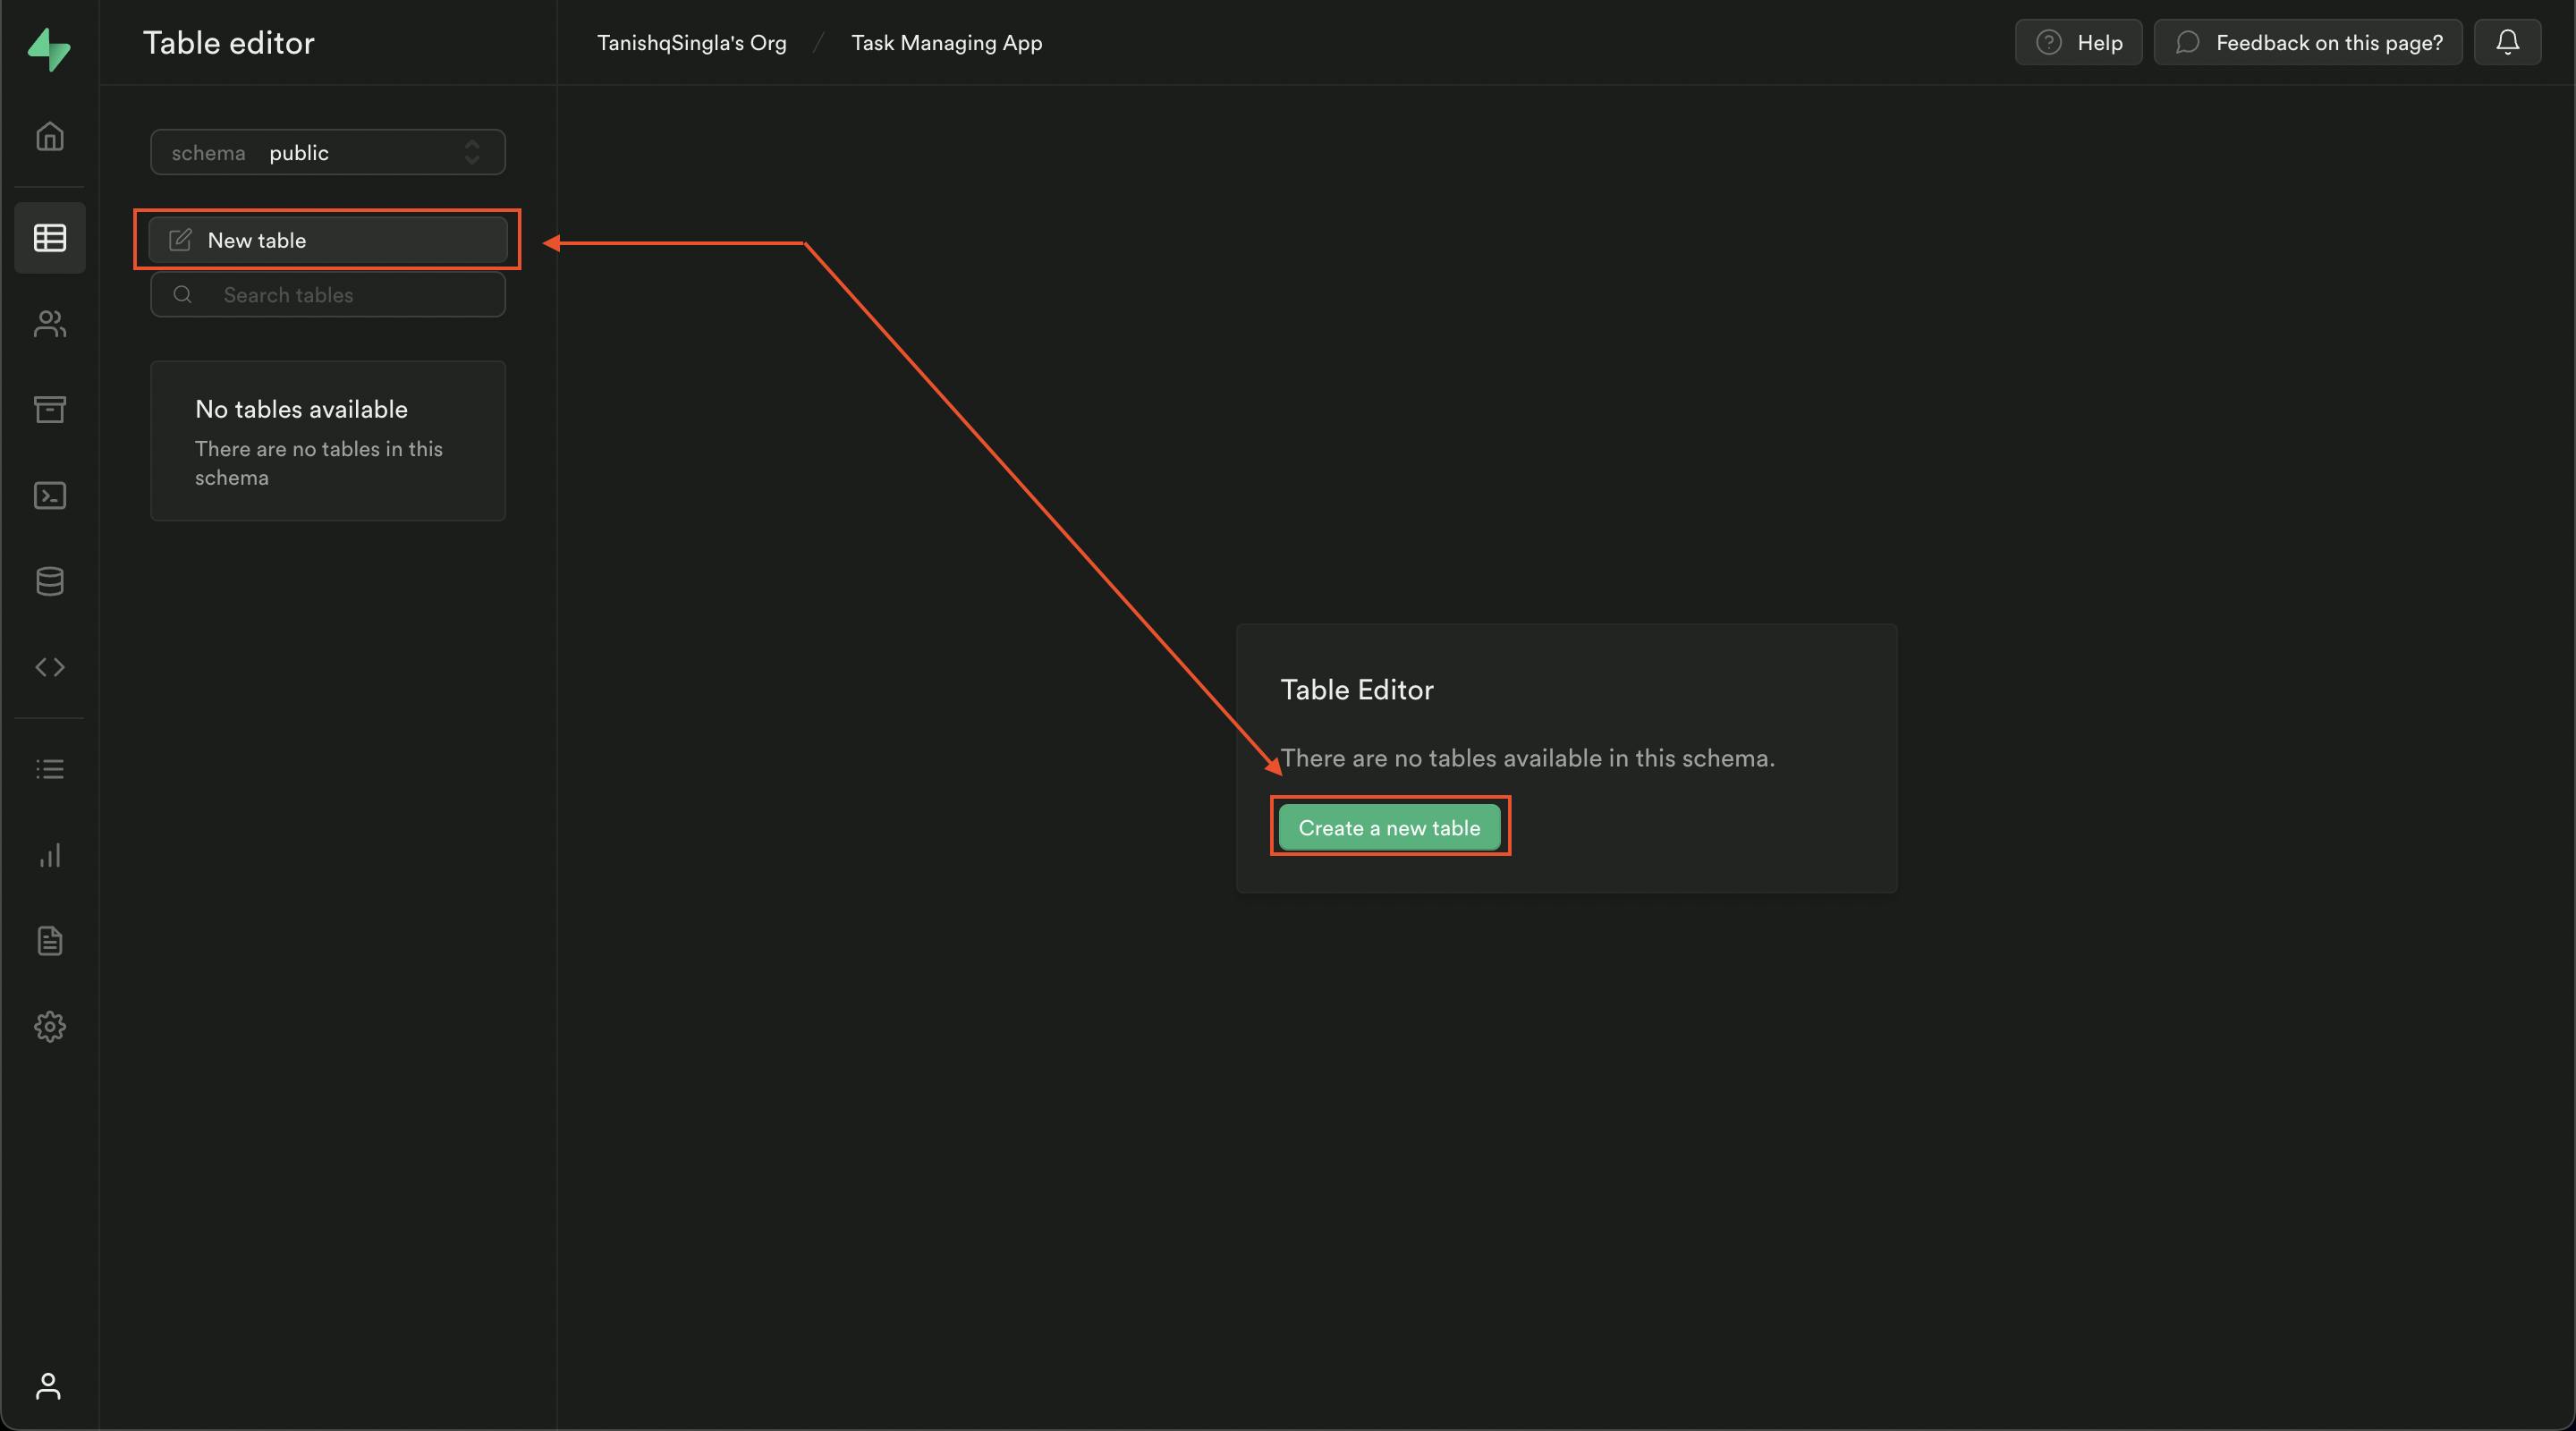
For using supabase UI go to table editor in the left pane and click new table.
After you click on create table you'll see a sidebar. In the sidebar you'll see option to provide name and description to your table and two database columns already provided i.e id and created_at.
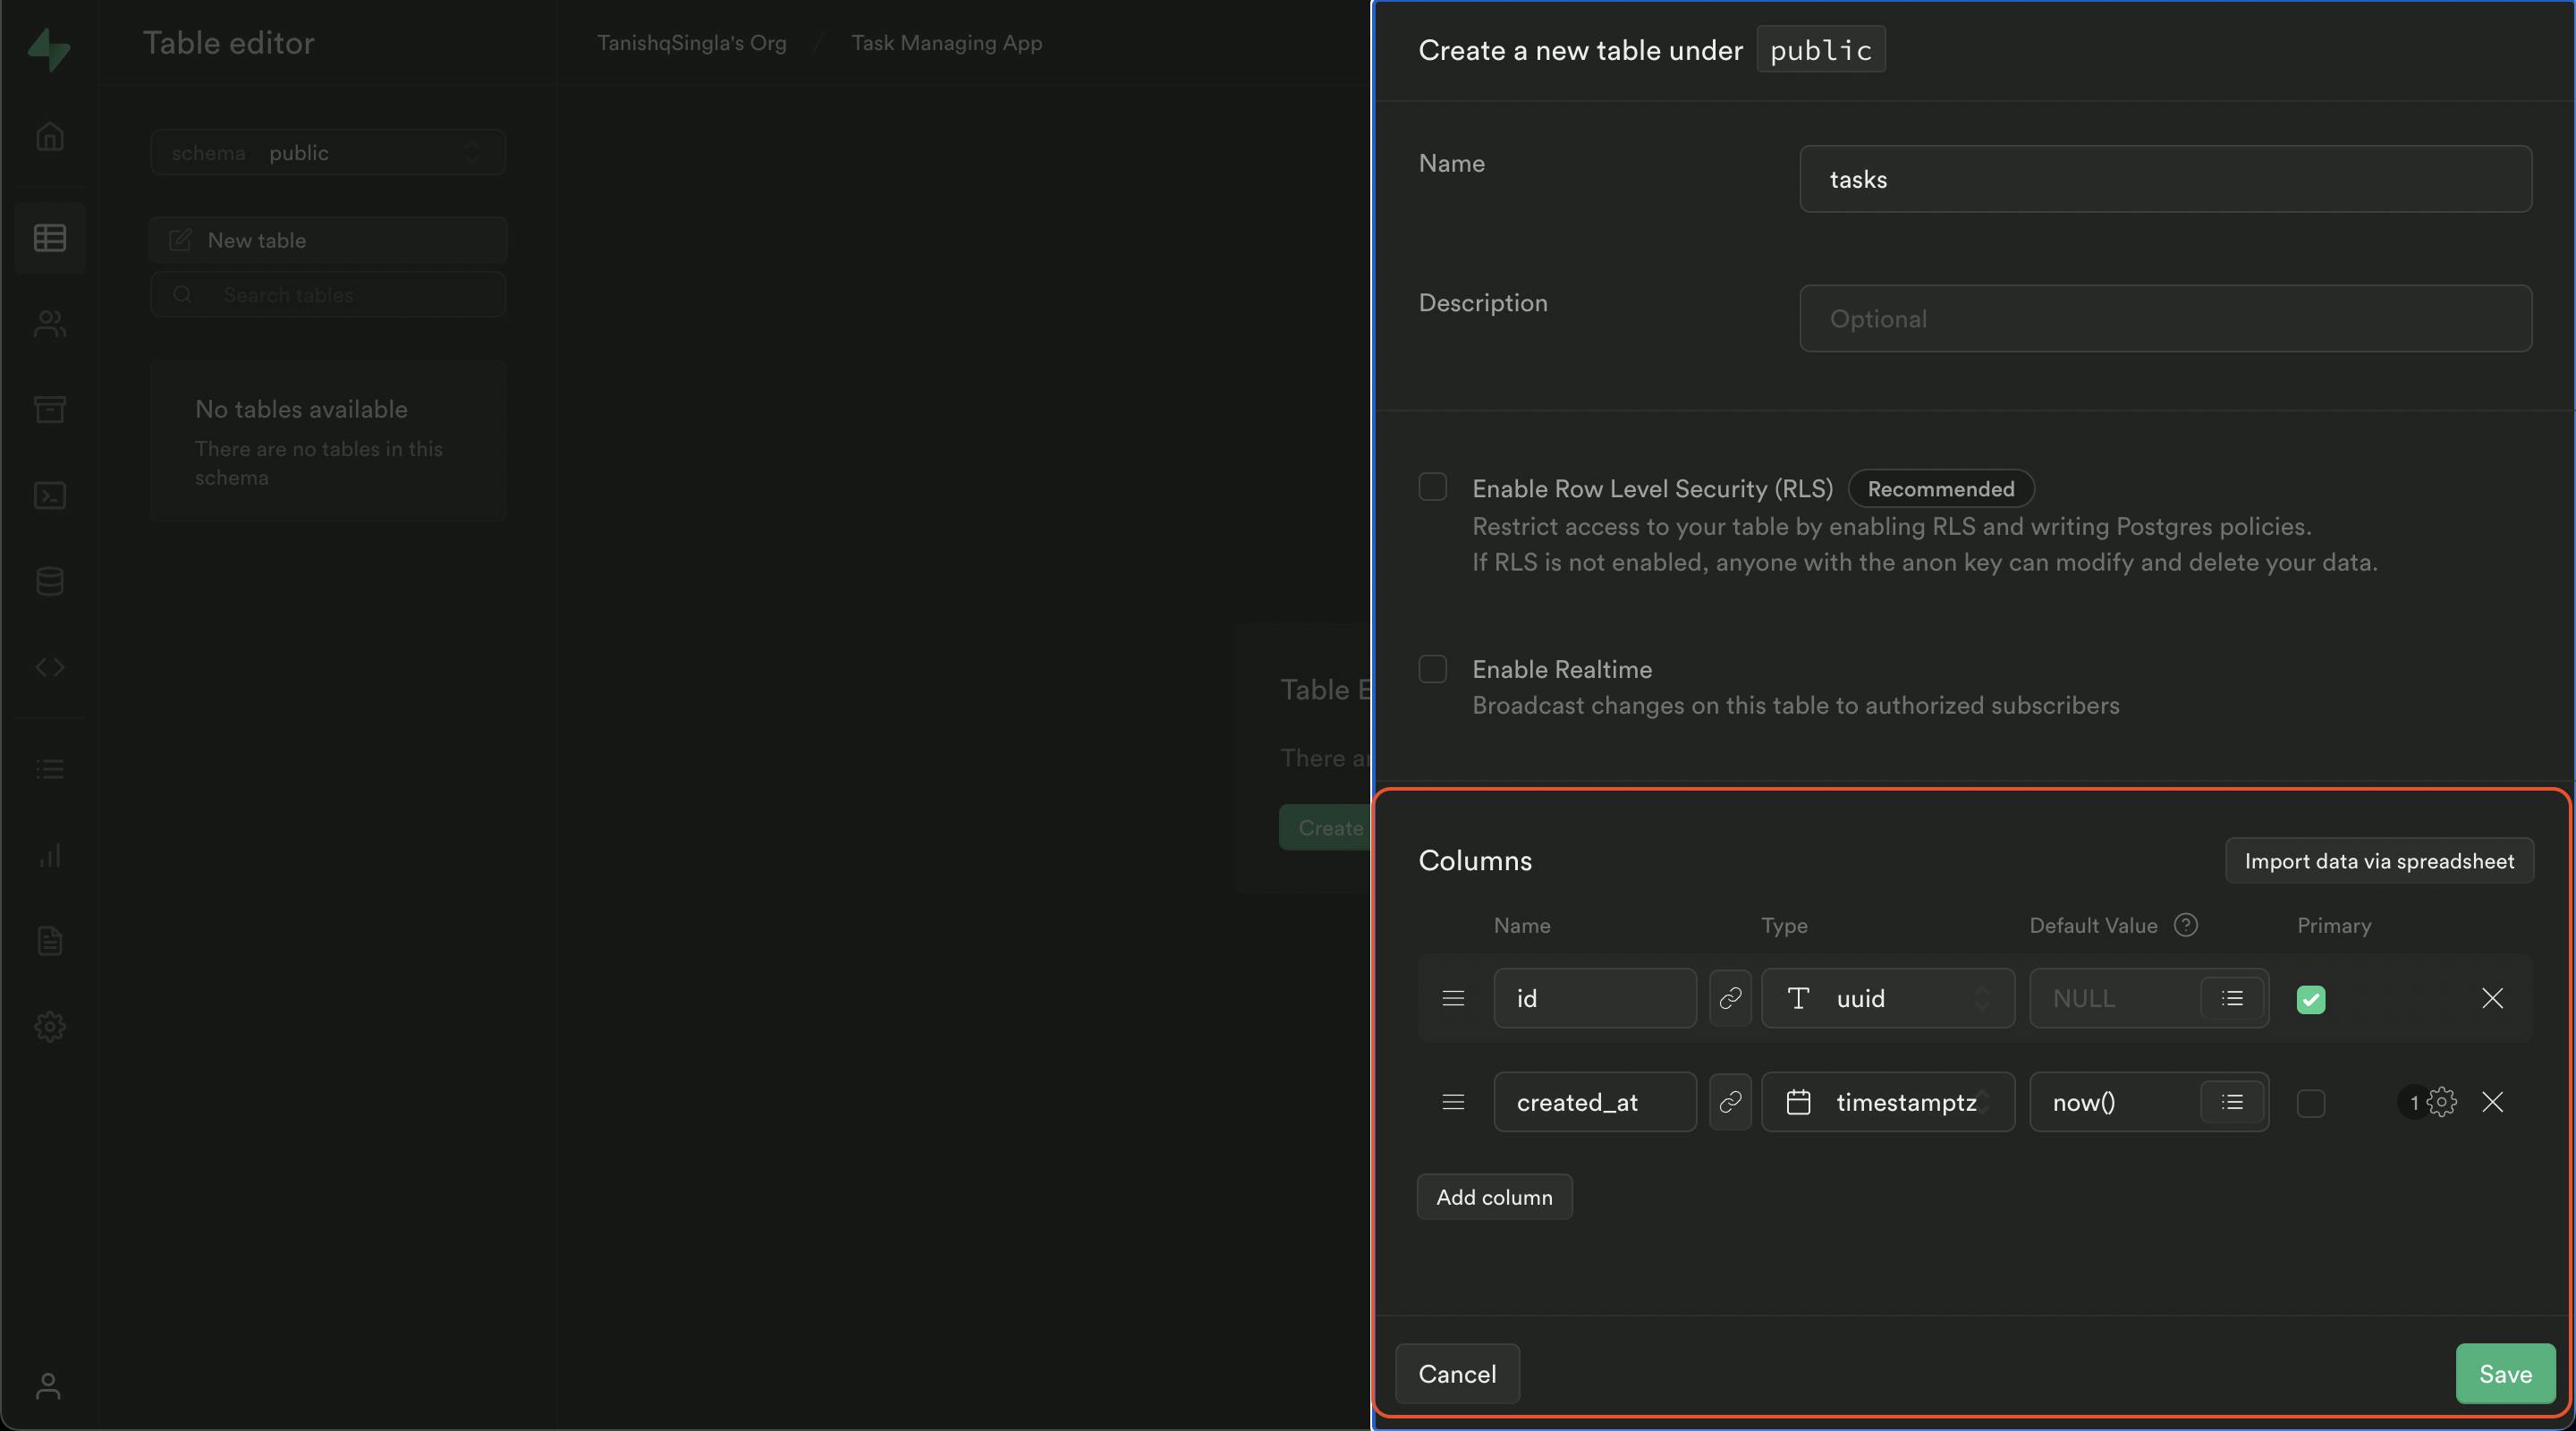
I am going to change a few values
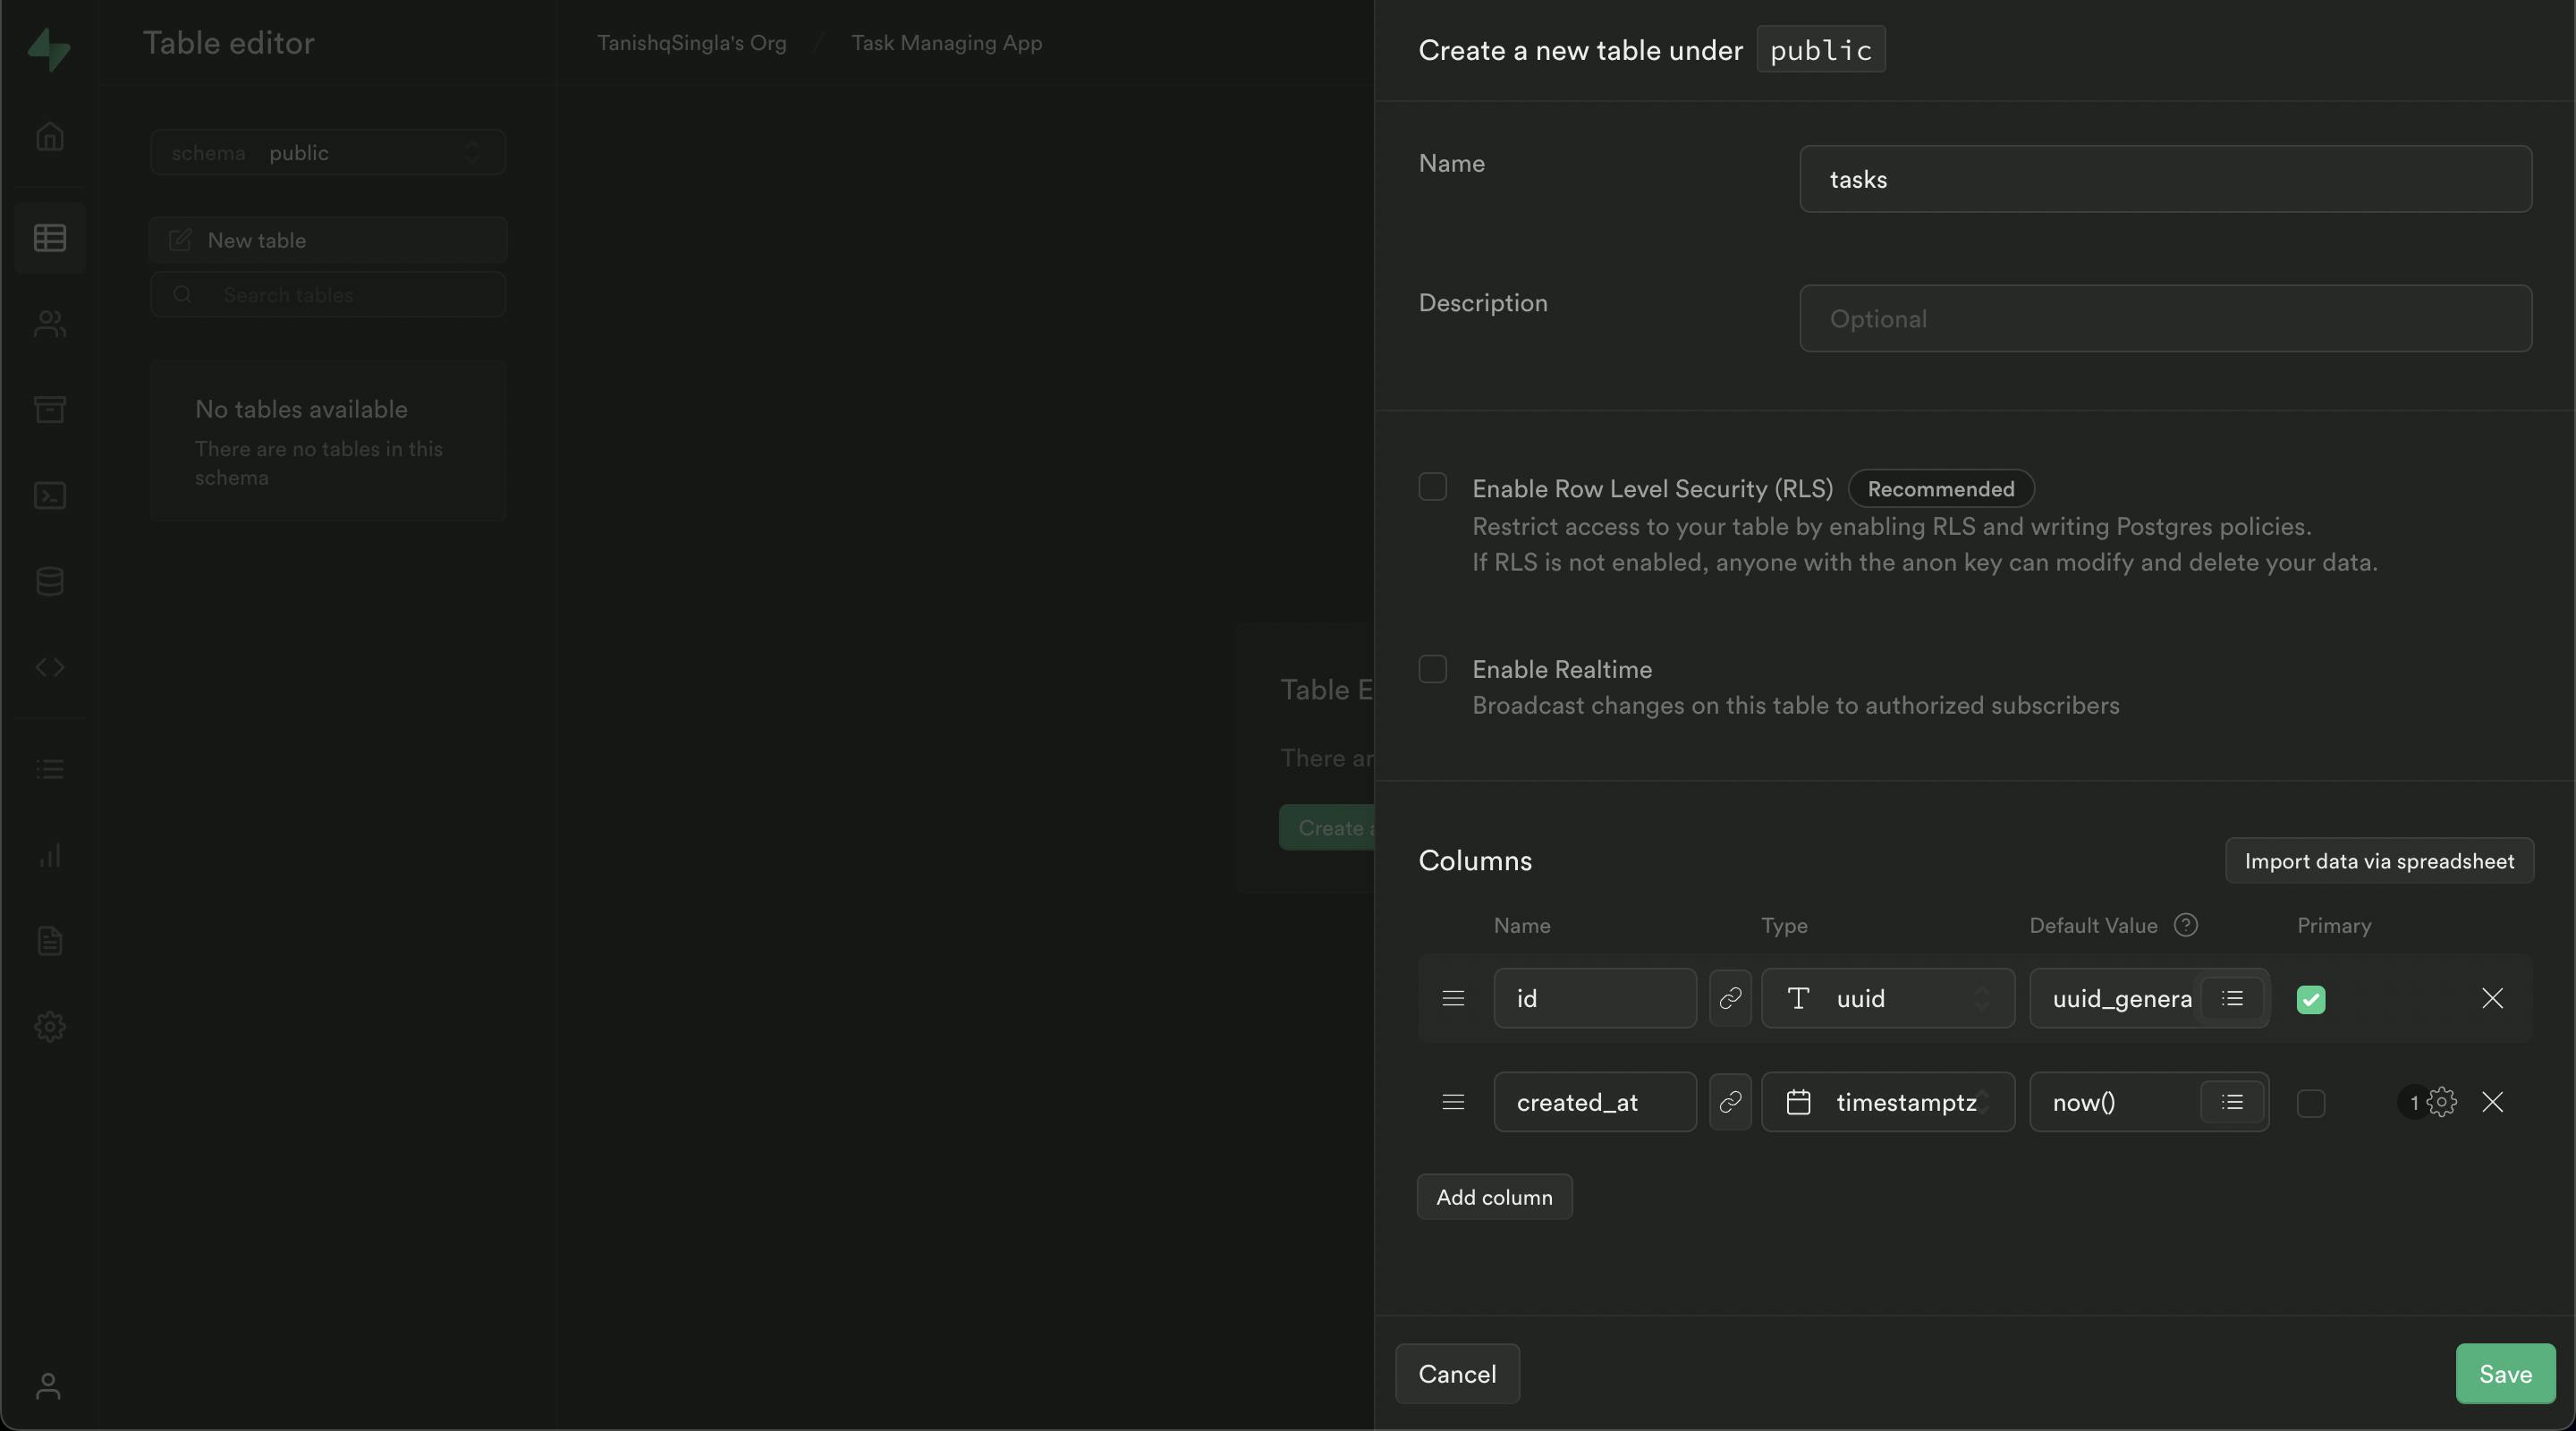
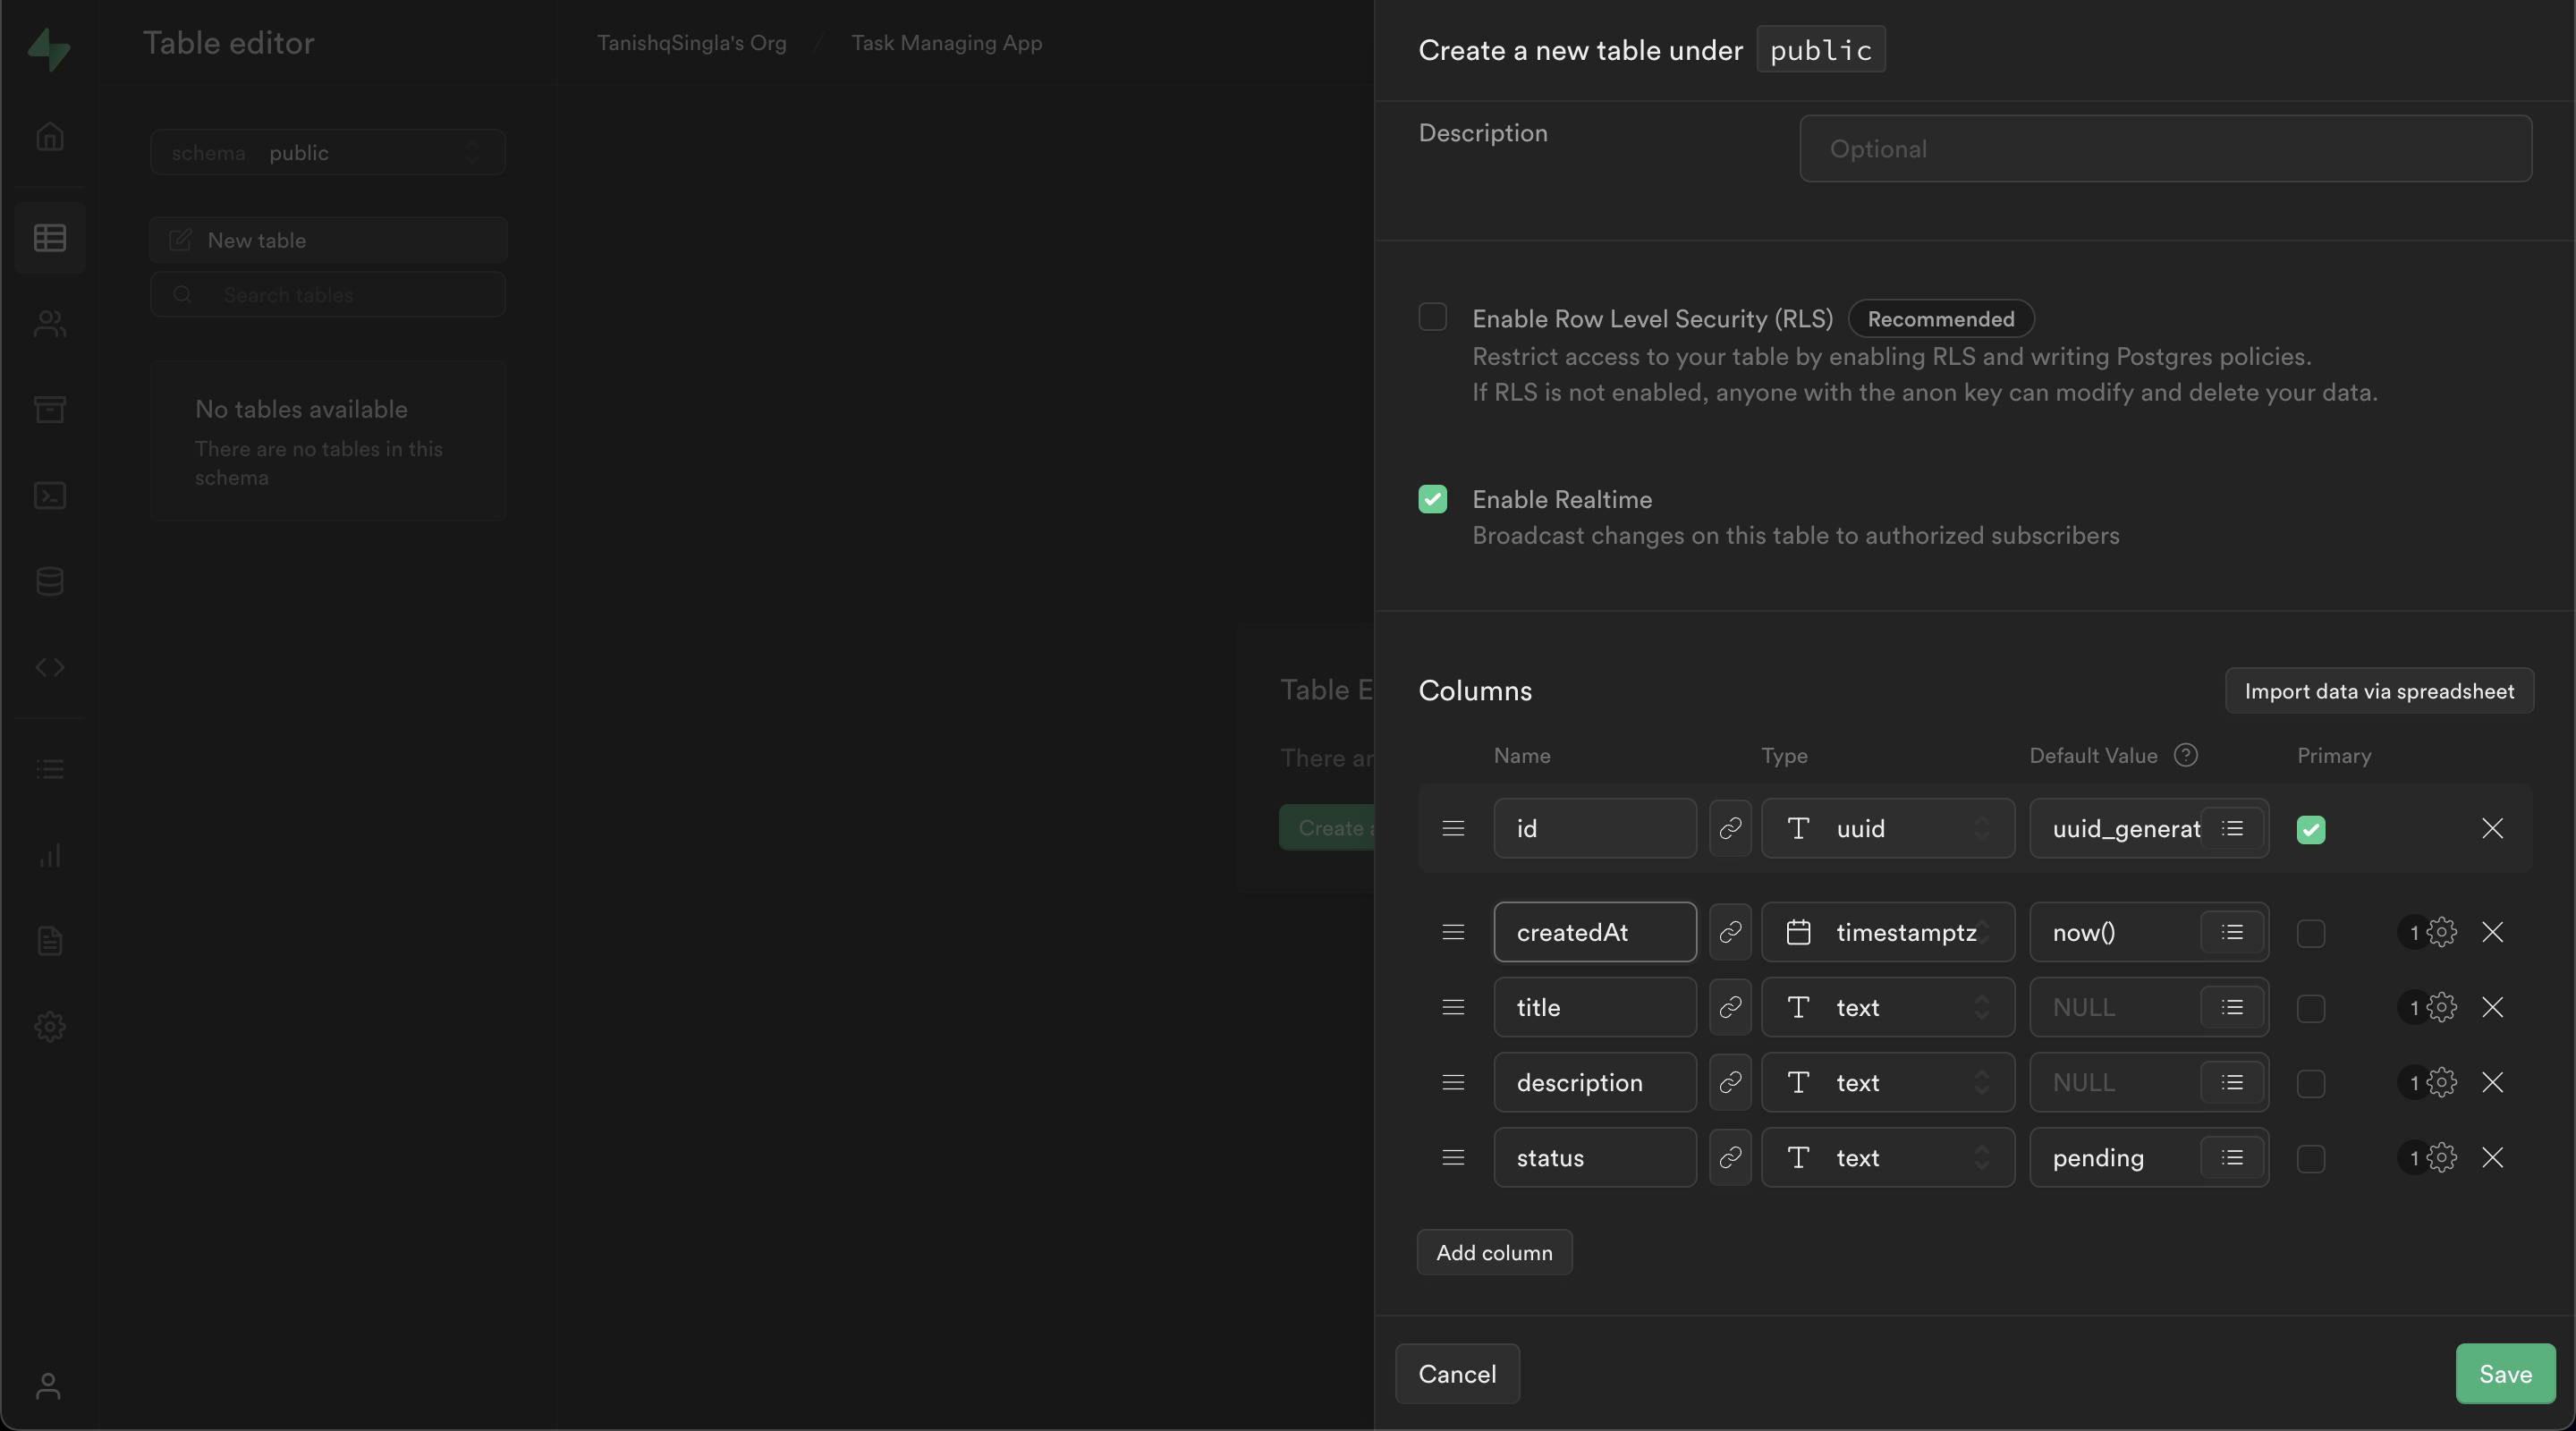
iddata type touuidand its default value will be generated by default value to to a function that will return uuids, you can do that by clicking on the hamburger menu inside the default value input field and selecting theuuid_generate_v4()under suggestions.created_attocreatedAt, cause I like camel casing.- I am also going to enable realtime, to show data instantly when someone updates it.
After:
Now, let's add different fields to our table. I am going to add following fields to the table.
titledescriptionstatuswith default valuependingand their type is going to betext.
The result is going to look like this:
Now just hit save and you have successfully created your database table.
Creating table using Supabase SQL editor
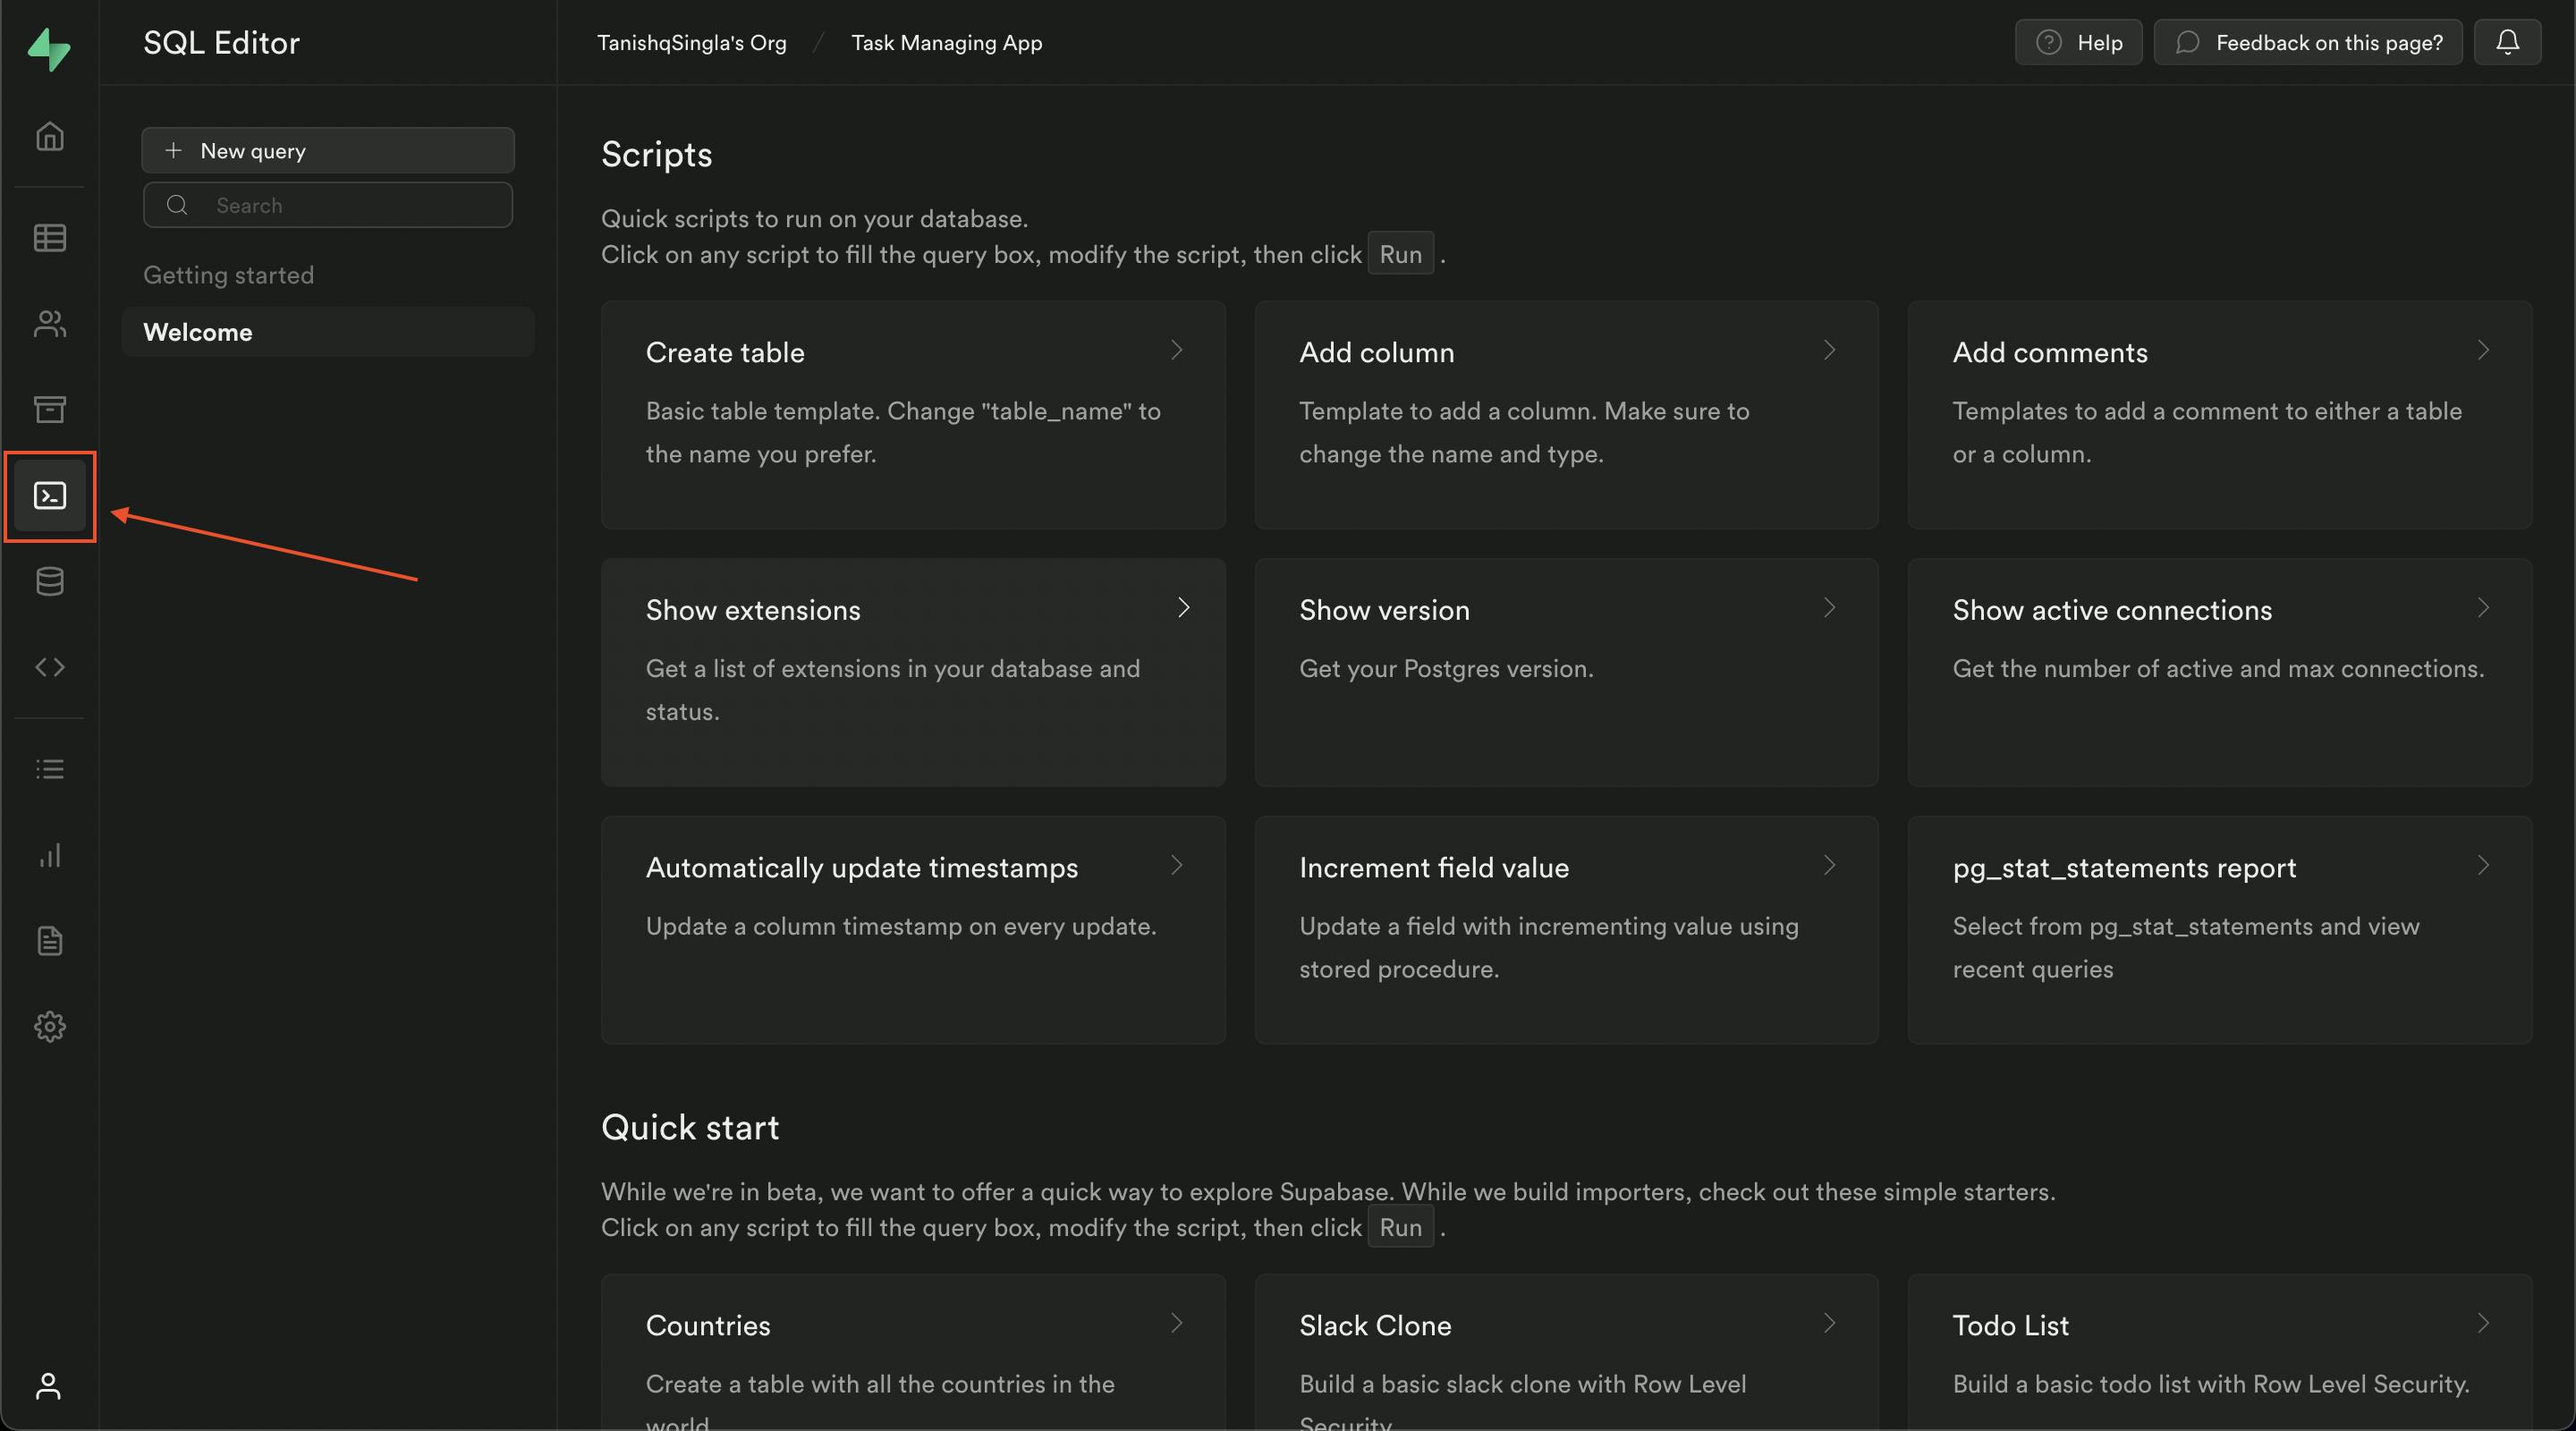
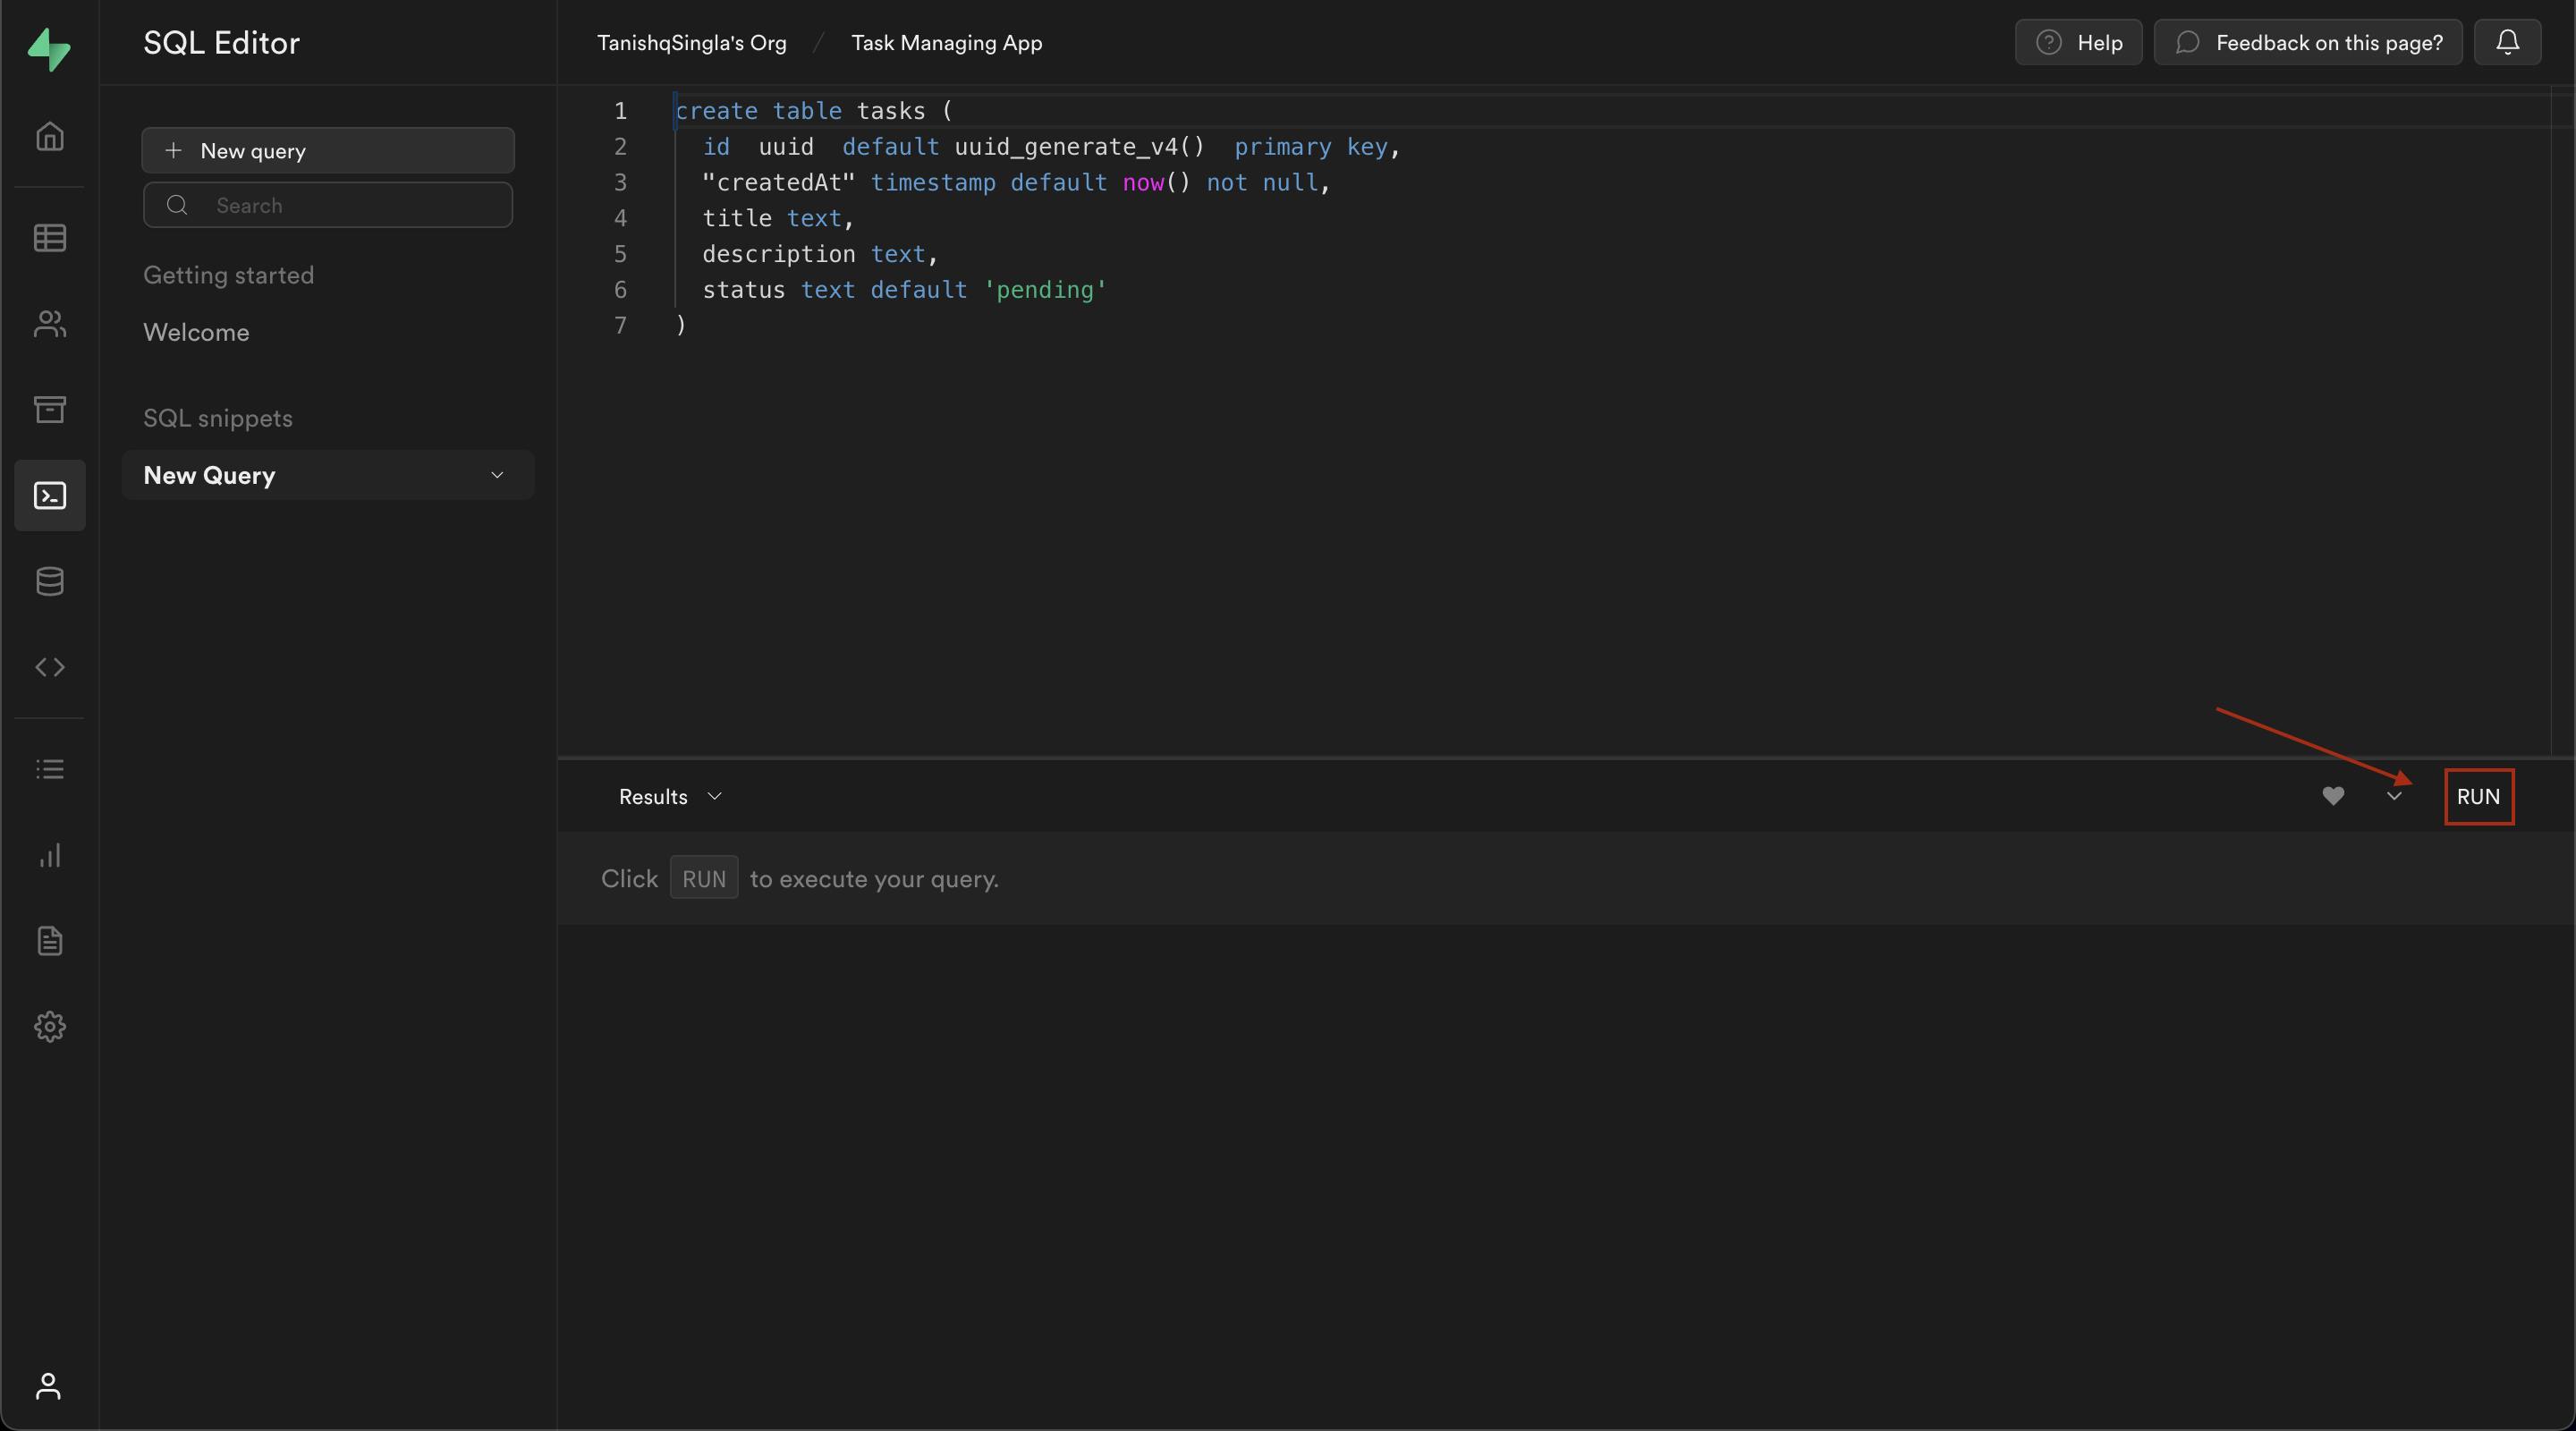
For creating table using SQL editor click on the SQL editor.
Click on New Query to open an editor where we will be writing our SQL query.
This is the query I'll be using to create our table.
create table tasks (
  id  uuid  default uuid_generate_v4()  primary key,
  "createdAt" timestamp default now(),
  title text,
  description text,
  status text default 'pending'
)
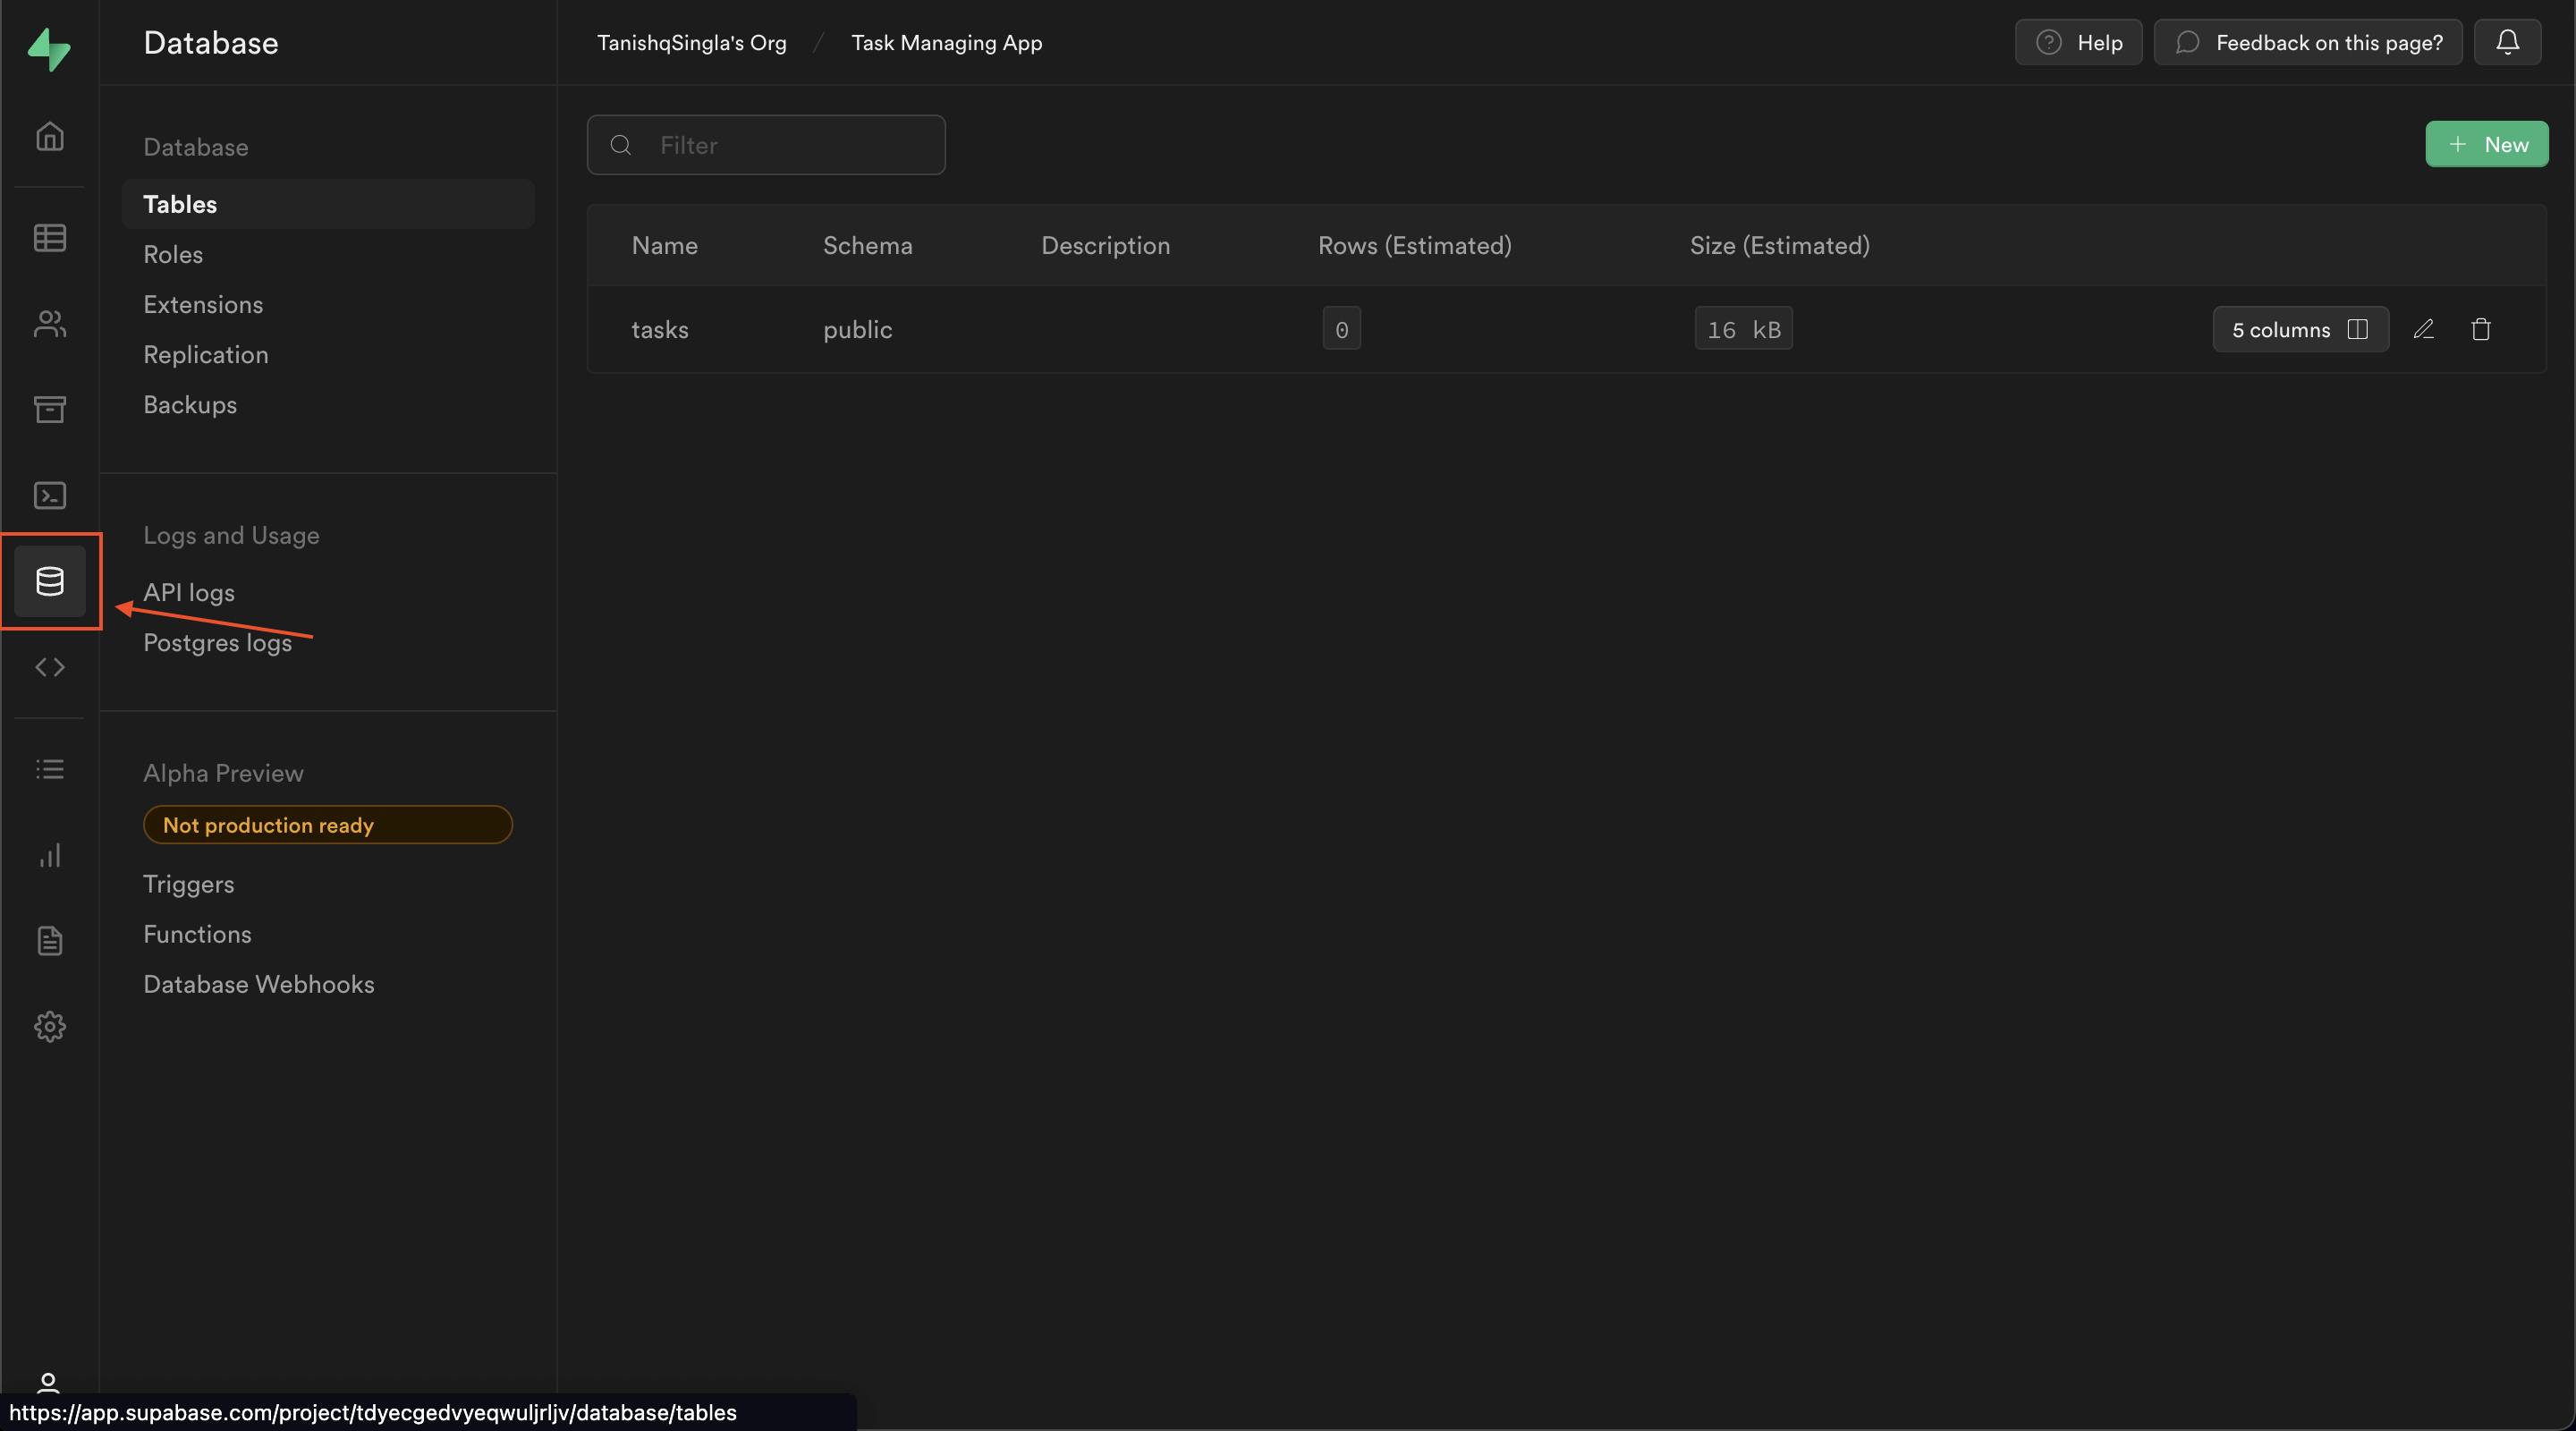
After writing the query click run and your table will be created, you can check that by clicking on table editor or view your database by clicking the database icon.
Now if you remember we enabled realtime in our table when we created it using the supabase UI, we can do the same for this table by writing a new query or using supabase UI.
You can refer supabase doc for enabling realtime. `I've used the following query to enable realtime:
begin;
  drop publication if exists supabase_realtime;

  create publication supabase_realtime;
commit;

alter publication supabase_realtime add table tasks
Using supabase UI to enable realtime.
For enabling realtime using UI click on Database icon in the left pane
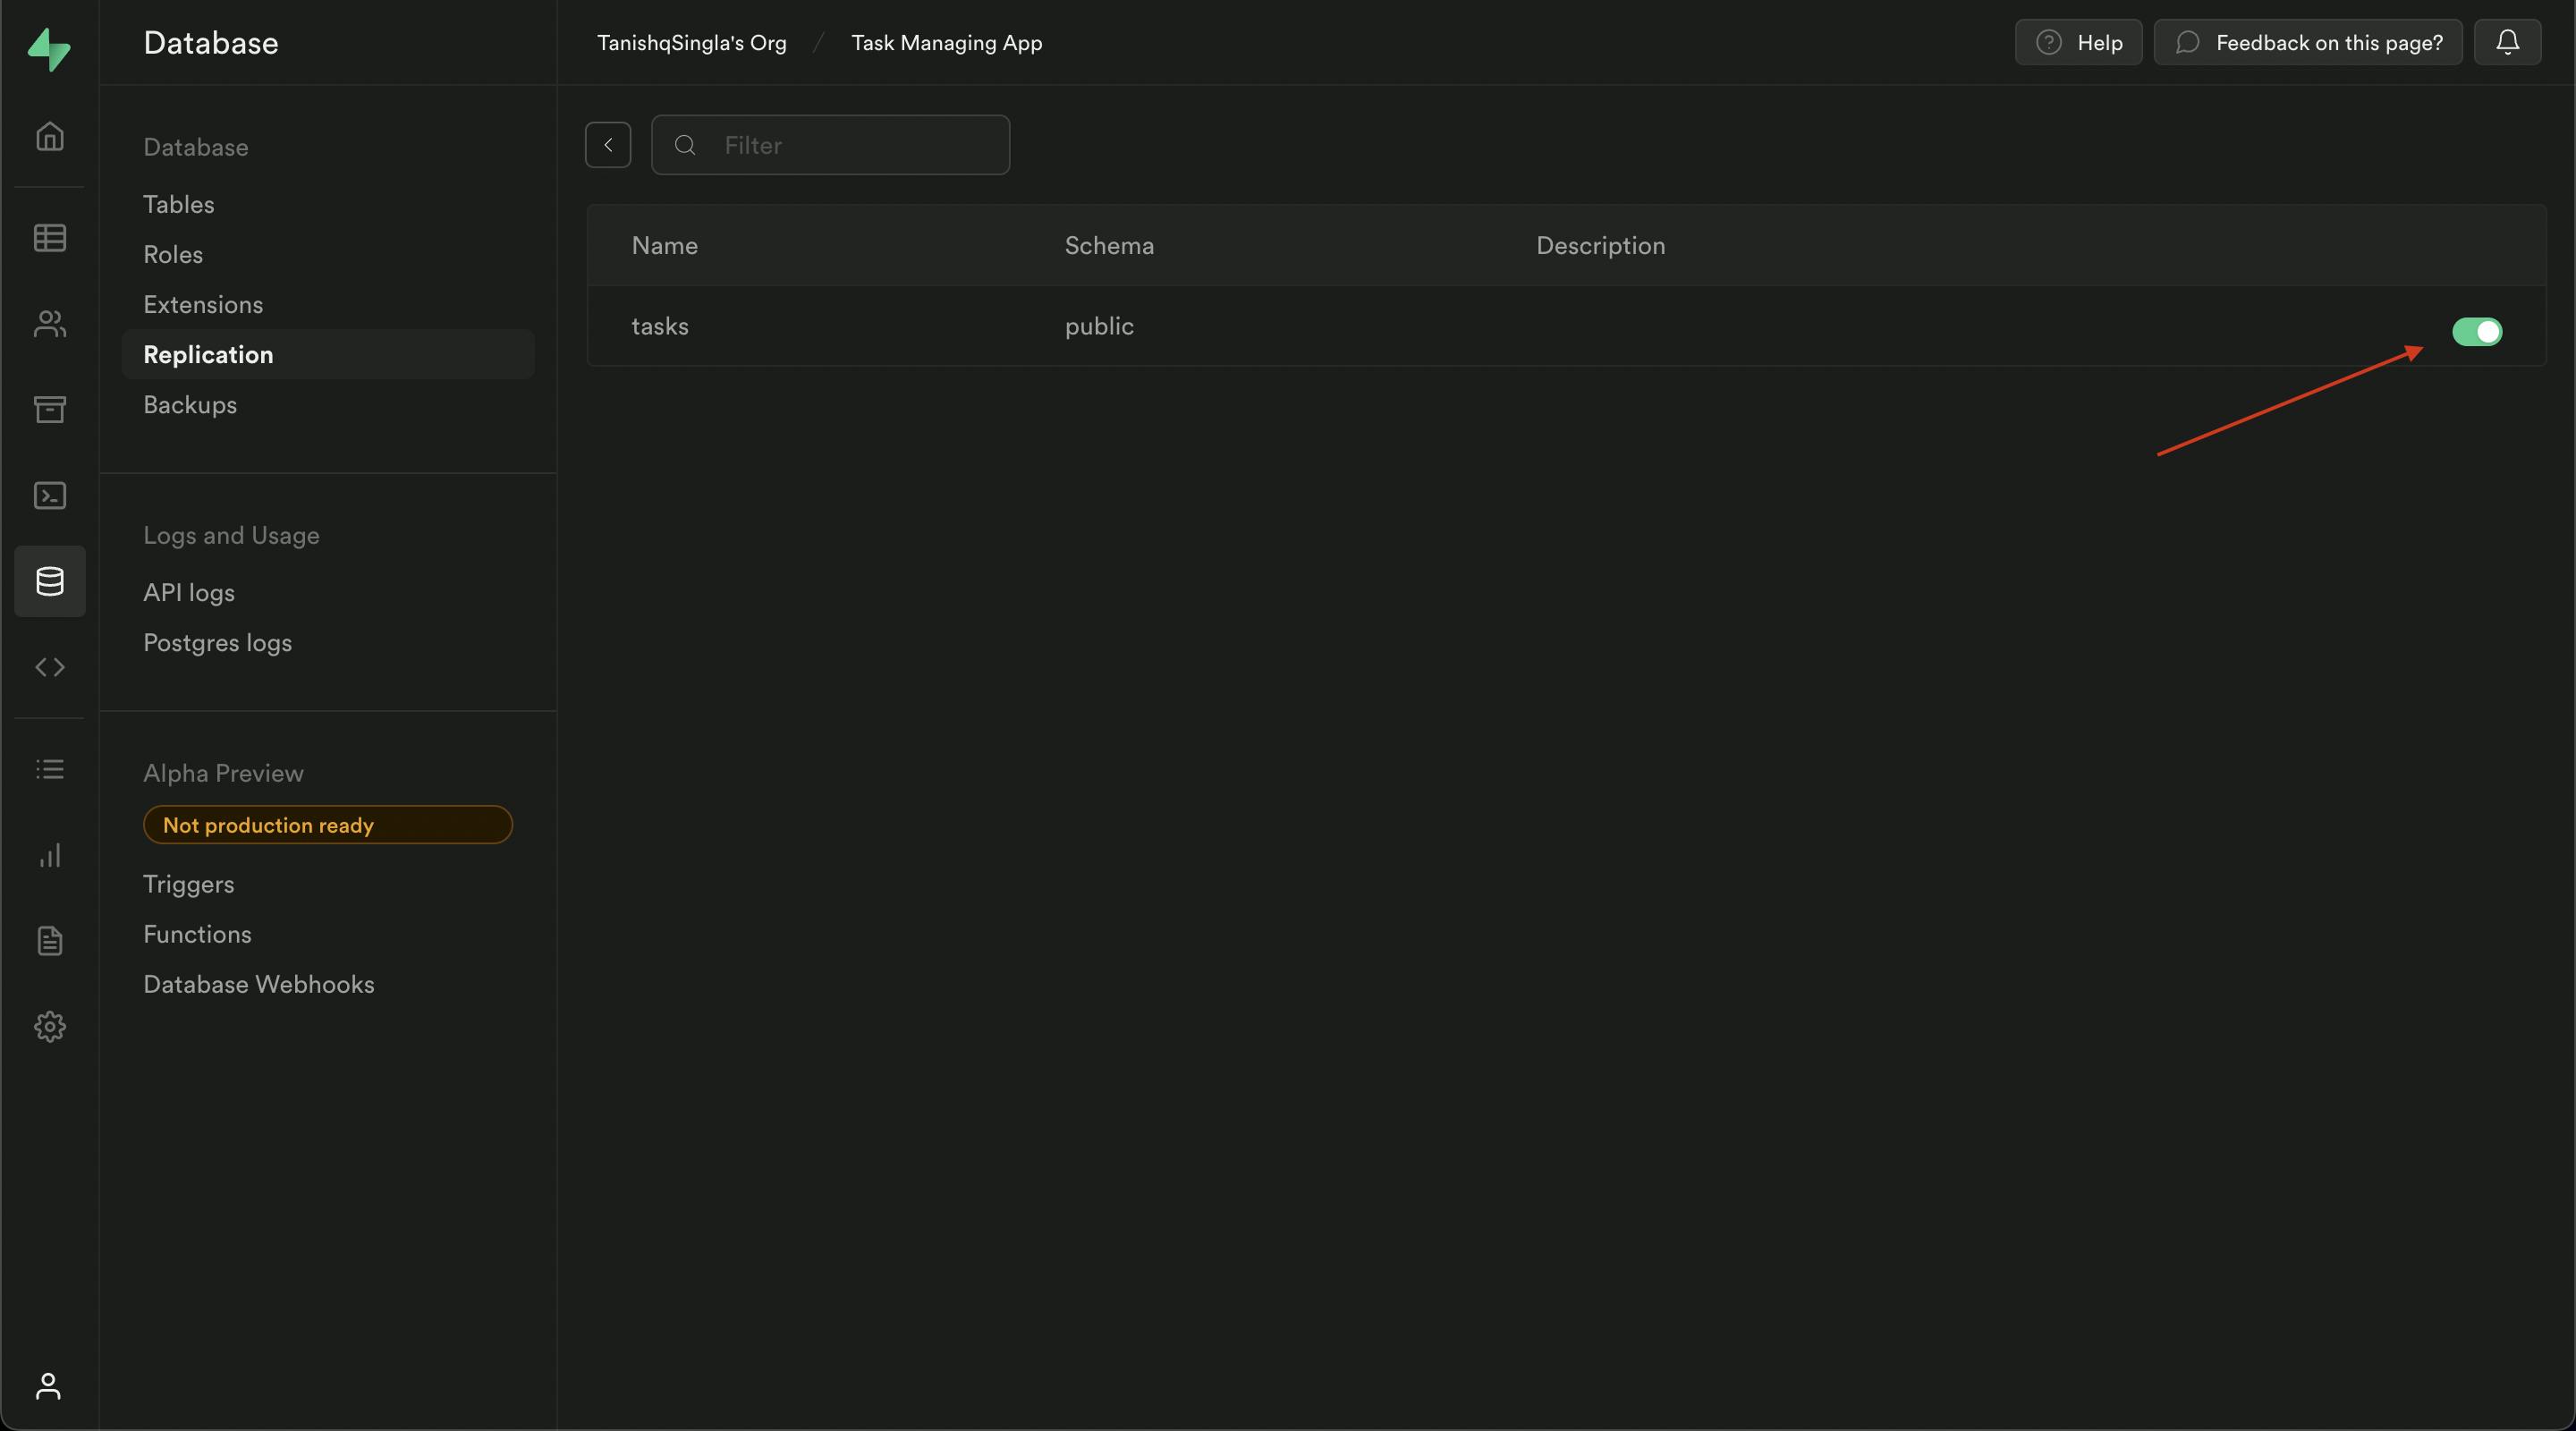
Now click on Replications and click on the button under source column.
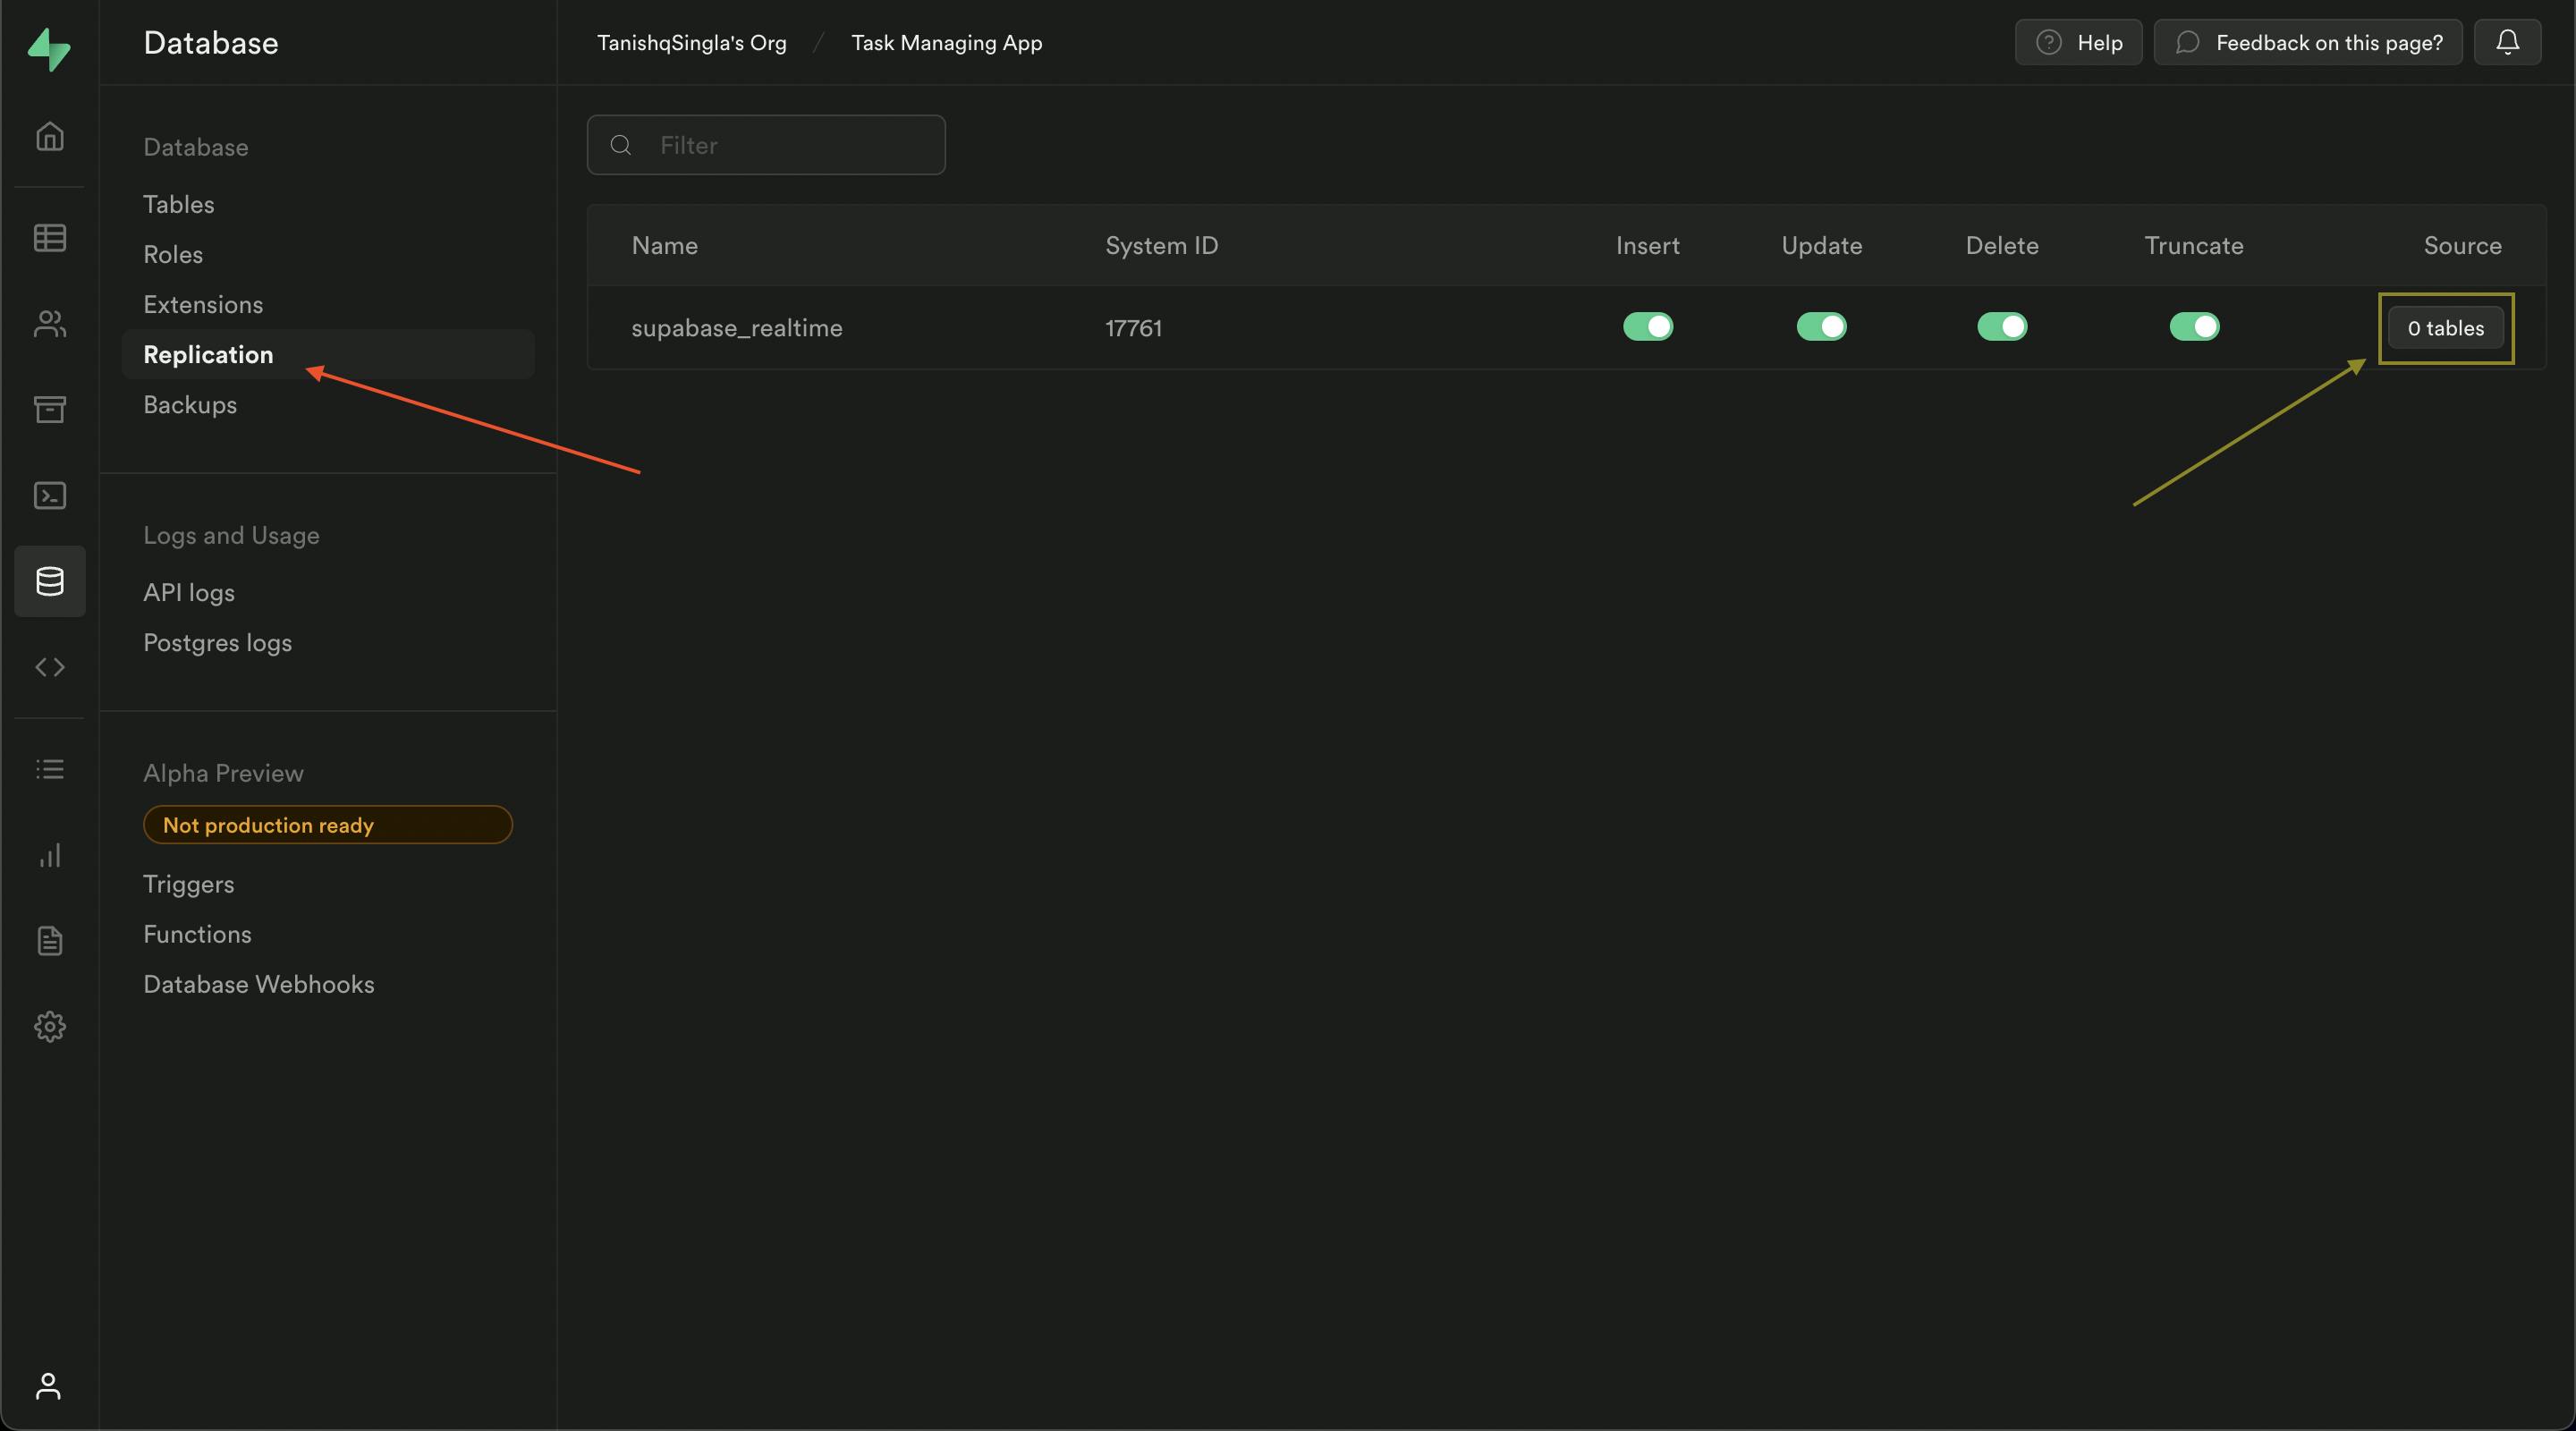
Now click on the switch to enable replication for your table, this will enable realtime for your database table.
NOTE: Supabase recommends using RLS (Row level security) when using realtime this is to prevent unauthorized read and writes to your DB, we will setup this later when we will setup authentication for our app.
Hurray! You've successfully created your table in supabase.